


- 5,210 views, 2 today

978
Since everyone seemed to really like my rainbow/mixed color hair I decided to make a tutorial! Okay. This tutorial has led me to an idea of "CuteMurphy's Weekly Mini-Tutorials!" I'll do a mini tutorial every week (probably on Sunday)More Info
I'll hopefully release them on Sundays but it seems like there aren't many good tutorials out there. So, I will try to release weekly tutorials for you guys from one of the skins I make of the week! This week, was of course, my rainbow hair!
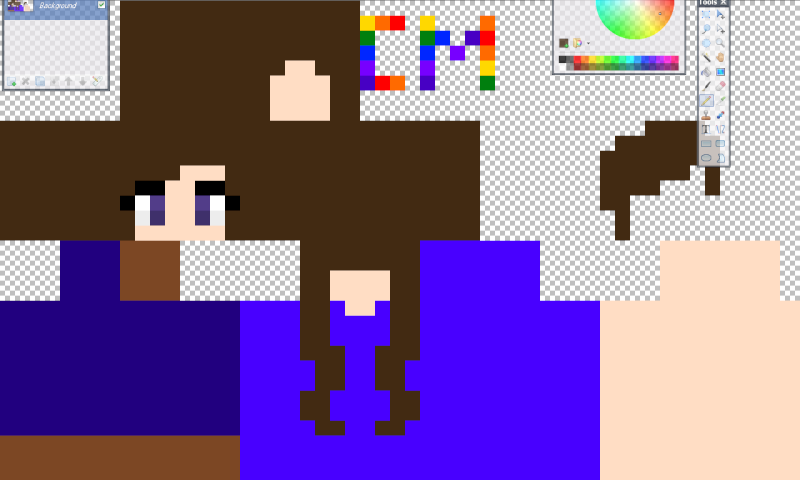
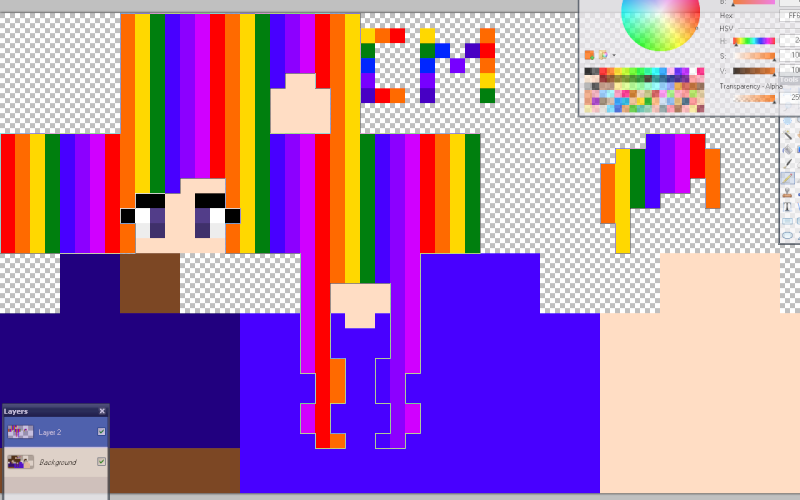
Step 1: Make the base of your hair. It can be any color. I decided to go with the same kind of shape I did with my first rainbow hair because I didn't have any other ideas.
URL
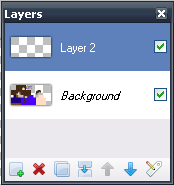
Step 2: This is VERY important. You MUST make a layer for the hair to turn out right. I repeat you MUST make another layer for it to turn out right.
URL
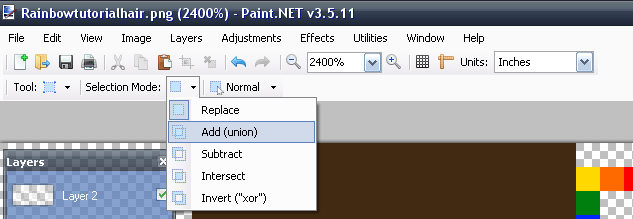
Step 3: On your new layer go to the select tool. Be sure to make it where you can select more than once.
URL
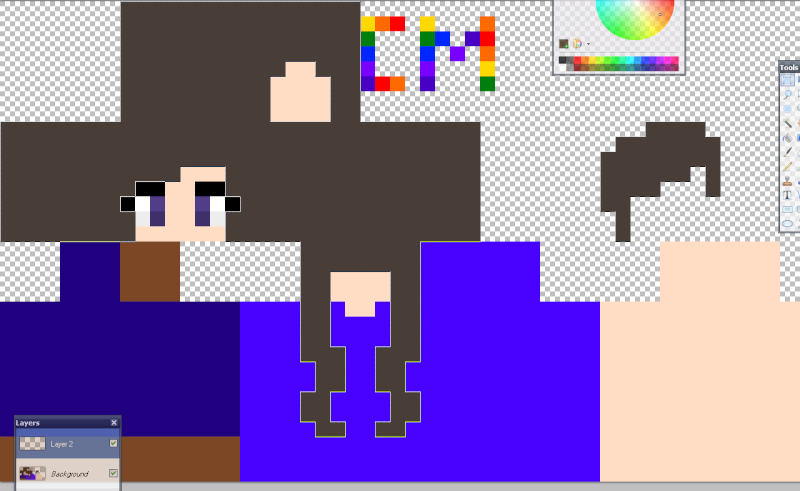
Then select all your hair!
URL
Step 4: You can do straight lines or you can do curves. For this specific hair I did lines, but the first time I did lots of curves!
URL
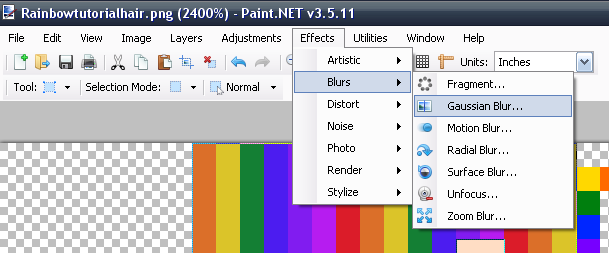
Step 5: Now, this whole time you should have had your hair selected. If it isn't selected by this point select it again. Go on effects, under blur is Gaussian Blur. This is what makes it have the rainbowy blend look. (This is also why you MUST have your hair selected when you use this effect or else it will blur out of your hair range, and this is also why you have to use layers. If you have this all on one layer then the gaussion blur will mix in the colors of the rest of your skin and so it won't just be your beautiful rainbow colors.)
URL
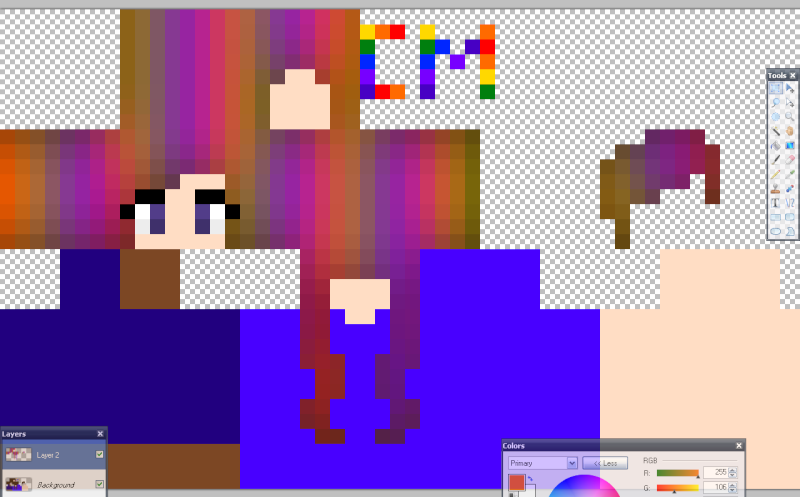
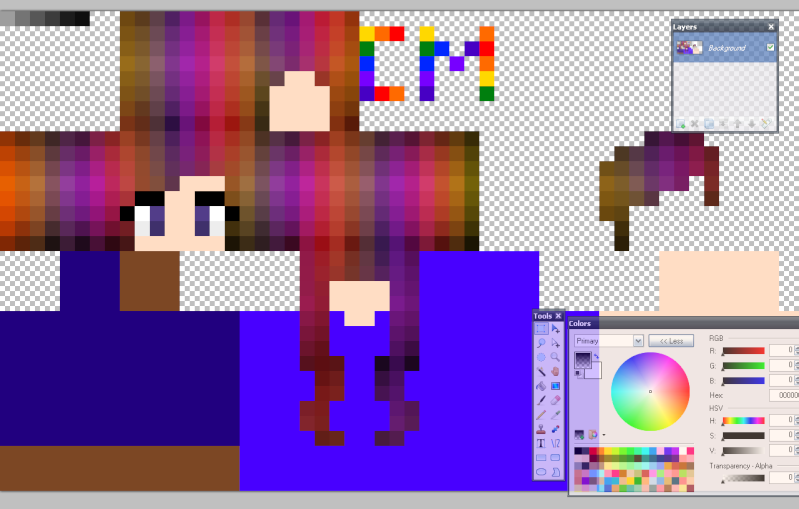
Here is what it looked like after I used Gaussian Blur. Also, I suggest only using 2 or 3 on the gaussion meter so it doesn't get TOO blurry. Please note that after I blurred my colors, I compressed both layers together.
URL
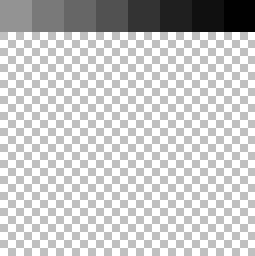
Step 6: Now make your palette from black down.
URL
Step 7: I'm shading it the way I usually shade my hair. You can do it your normal way if you want to. But still on another layer you shade the hair with the palette you made earlier. (Note: You must have this gray hair shading on a separate layer from your skin and your hair. Or else it won't work.)
URL
Step 8: Now for the final part! You go to layer properties under layer
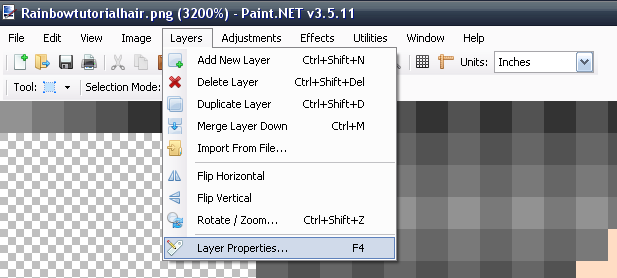
URL
After you get to layer properties go to mode and change it to overlay
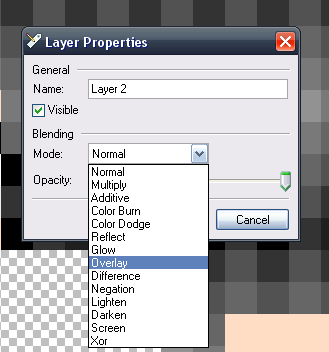
URL
After you click Overlay if you want, you can adjust the opacity to make it less defined. (I normally change it, it depends on how it looks like on the skin.)
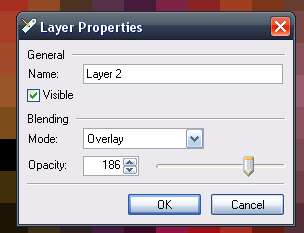
URL
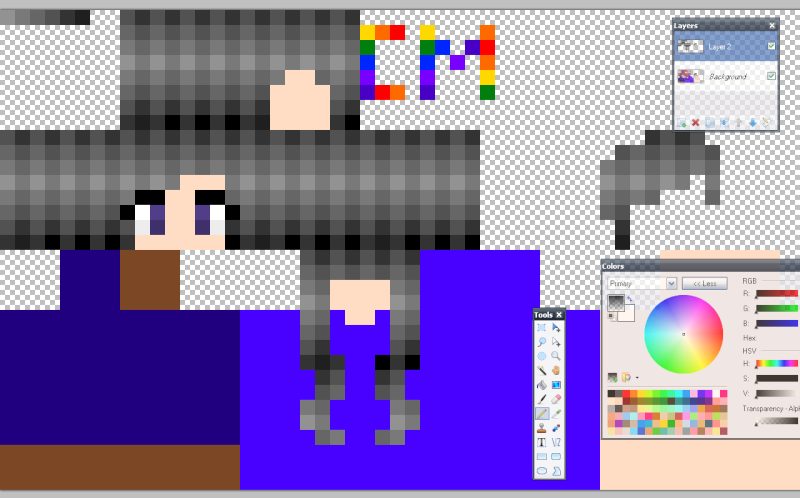
And this is what it looked like after I did the overlay on the shading. (See, with the overlay you still go the shading only it was still nice and colorful!)
URL
And you're done!
If you have any questions you can comment below or PM me! If you want to know how I shaded my hair click here!
Please tell me how you liked the tutorial and if it was helpful :)
Stay tuned for more~
And here is the hair I made for the tutorial. You can add it on to your personal skins!

URL
I'll hopefully release them on Sundays but it seems like there aren't many good tutorials out there. So, I will try to release weekly tutorials for you guys from one of the skins I make of the week! This week, was of course, my rainbow hair!
Notice
I use Paint.net for this tutorial. It might not work with your program so be aware! You mostly just need a program with selection, layers, the overlay option (for shading the hair), and a way to blur. Most blurs will work but I specfically used Gaussion blur.
If you have a Windows then you can get Paint.net for free if your current program won't work for this, and if you have a Mac then maybe check out gimp? I think it can do everything that you need for this.
If you have a Windows then you can get Paint.net for free if your current program won't work for this, and if you have a Mac then maybe check out gimp? I think it can do everything that you need for this.
Step 1: Make the base of your hair. It can be any color. I decided to go with the same kind of shape I did with my first rainbow hair because I didn't have any other ideas.

URL
Step 2: This is VERY important. You MUST make a layer for the hair to turn out right. I repeat you MUST make another layer for it to turn out right.

URL
Step 3: On your new layer go to the select tool. Be sure to make it where you can select more than once.

URL
Then select all your hair!

URL
Step 4: You can do straight lines or you can do curves. For this specific hair I did lines, but the first time I did lots of curves!

URL
Step 5: Now, this whole time you should have had your hair selected. If it isn't selected by this point select it again. Go on effects, under blur is Gaussian Blur. This is what makes it have the rainbowy blend look. (This is also why you MUST have your hair selected when you use this effect or else it will blur out of your hair range, and this is also why you have to use layers. If you have this all on one layer then the gaussion blur will mix in the colors of the rest of your skin and so it won't just be your beautiful rainbow colors.)

URL
Here is what it looked like after I used Gaussian Blur. Also, I suggest only using 2 or 3 on the gaussion meter so it doesn't get TOO blurry. Please note that after I blurred my colors, I compressed both layers together.

URL
Step 6: Now make your palette from black down.

URL
Step 7: I'm shading it the way I usually shade my hair. You can do it your normal way if you want to. But still on another layer you shade the hair with the palette you made earlier. (Note: You must have this gray hair shading on a separate layer from your skin and your hair. Or else it won't work.)

URL
Step 8: Now for the final part! You go to layer properties under layer

URL
After you get to layer properties go to mode and change it to overlay

URL
After you click Overlay if you want, you can adjust the opacity to make it less defined. (I normally change it, it depends on how it looks like on the skin.)

URL
And this is what it looked like after I did the overlay on the shading. (See, with the overlay you still go the shading only it was still nice and colorful!)

URL
And you're done!
If you have any questions you can comment below or PM me! If you want to know how I shaded my hair click here!
Please tell me how you liked the tutorial and if it was helpful :)
Stay tuned for more~
And here is the hair I made for the tutorial. You can add it on to your personal skins!

URL
| Tags |
2 Update Logs
More Information : by CuteMurphy 08/09/2014 10:18:51 amAug 9th, 2014
I added more information about how you have to have layers, what the layers do, and I clarified that you have to have a new layer when you use your gray shading in one of the steps. I also listed another option for Mac users if you don't already have a program that can do this. (Since, you sadly can't get Paint.net on Macs) and I also just listed every option you need to do this hair.
LOAD MORE LOGS
tools/tracking
2555673
6
rainbow-hair-tutorial

![Interview: MayaCookieGirl [#1] Minecraft Blog](https://static.planetminecraft.com/files/resource_media/screenshot/1529/interviewwithmaya9166786_thumb.jpg)


![°αshℓєy° My Hair Shading Tutorial! [ 70 Subs Special] [ Popreel Witch Was Found After A Life Of Steves Contest Thing :P ]](https://static.planetminecraft.com/files/resource_media/screenshot/1440/small/yutrytuuuustealdisaskmehfurstbefurudownload8187369_thumb.jpg)

 KaineVibes
 Escapazition
 Sofia Silenttree
 BlissyMissy
 VersedRhyme41
 Hebgbs
 Hazem-chan
 CrystalRuby
 KEIKYU production

 illystray

 pathisgamer
Create an account or sign in to comment.