

- 4,378 views, 2 today

978
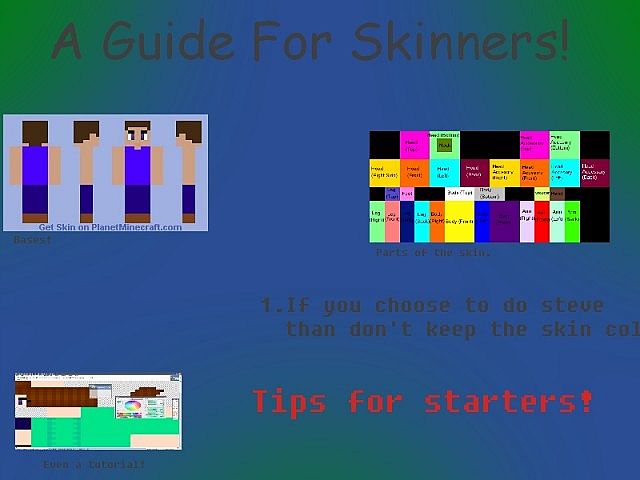
So, here is a complete guide on to skin from the very start of choosing a program, to give you basic idea of what you are about to read here are the sections!
Suggested Programs: In this section I have links to most of the downloads and programs that I suggest using! If you have any suggestions please comment!
Skin Bases: In this section I have links to my skin base, leostereo's skin base, and just the normal steve. If you don't like any of those you can click on the links I have to skin base searchs from PMC!
Skinning Tips: In this section I have important tips that will really help you to start skinning! Be sure to check them out :)
Skinning: In this section I try to help you come up with what to skin!
Basic Shading: Here I have 2 shading tutorials, the first is VERY simple, and the second one is a little trickier but both come out looking way better than it unshaded and are fairly simple :)
Posting the Skin: Here I recommend how to post your skins, it isn't really that helpful or necessary, but I thought I might as well :)
Suggested Programs
Ok, there are lots of programs you can use. There really isn't a best one overall, because everyone is different.
MCSkin3D: It's a highly suggested program for skinners, the parts are labeled and there's a preview, easy to use and helpful. I don't use it though. [WARNING: It does not work on Mac, so please don't try :)]
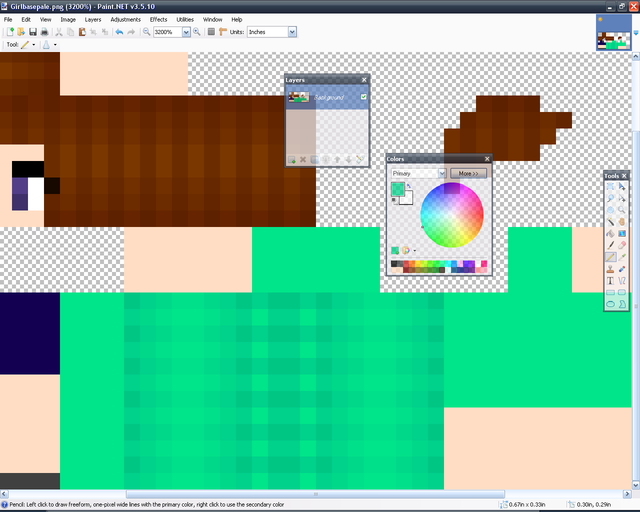
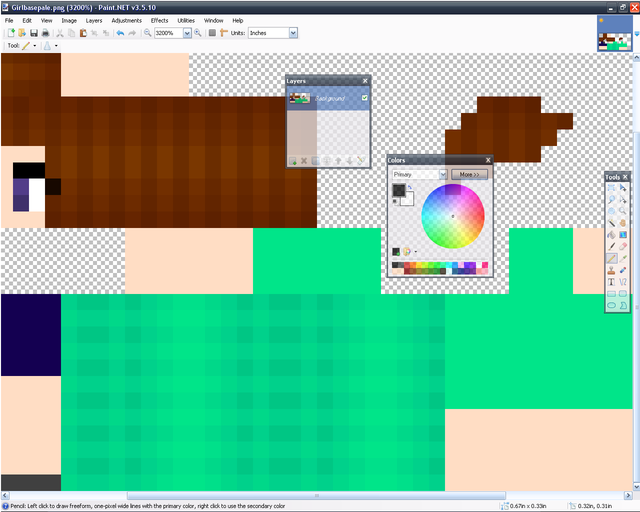
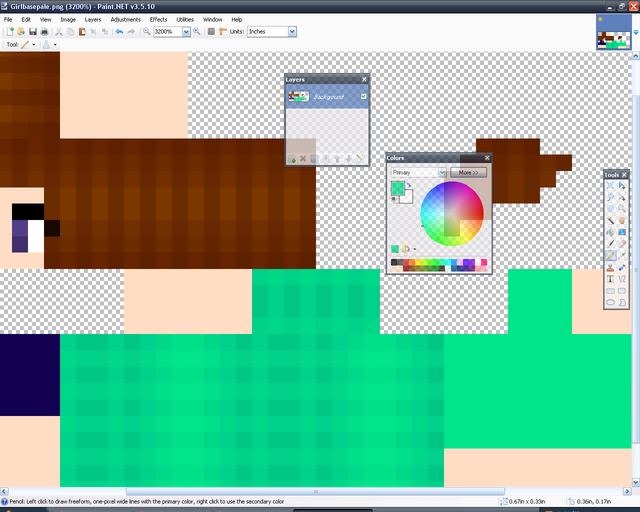
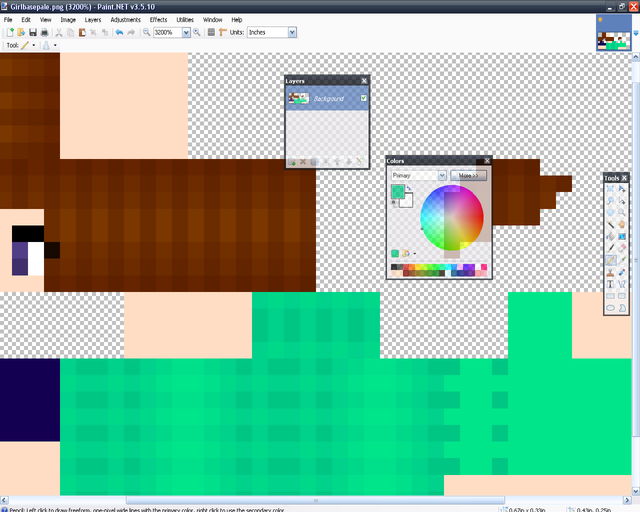
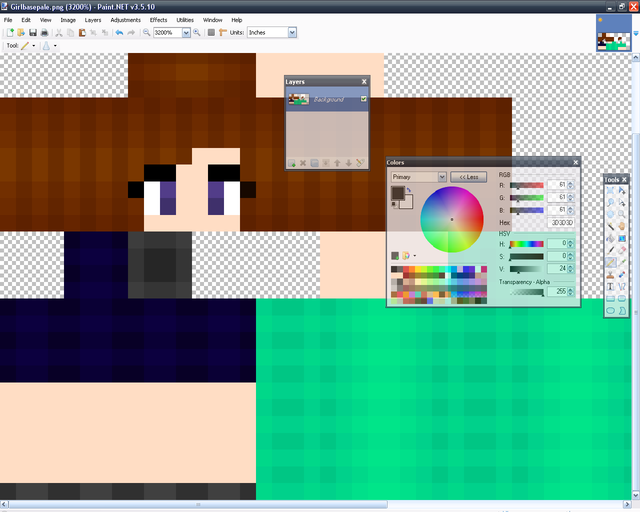
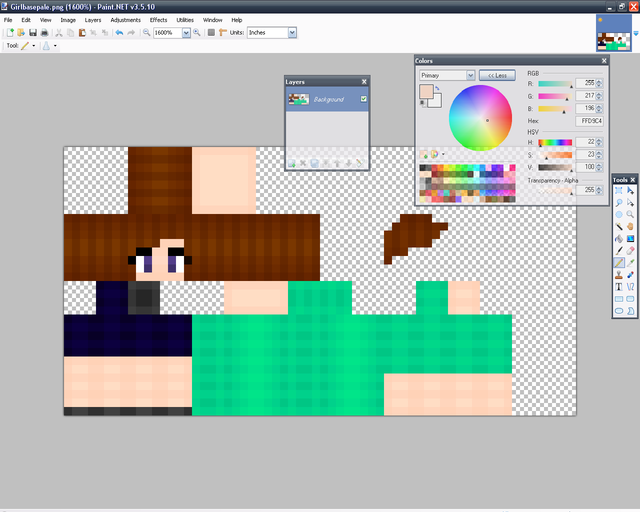
Paint.Net: It's really good, simple, easy to use and awesome! I use it so of course I'm gonna suggest it. Lots of good skinners use it like Leostereo. I would highly suggest this one, but everyone is different :) [WARNING: It does not work on Mac, so please don't try :) but, if you would like to try and find on for the mac click here!]
Gimp: It's basically a free Photoshop. Mymagic uses it and she's awesome. Haven't used it so I don't know how hard or easy it is but lots of people use it and make good skins.
PhotoShop: I don't have a link to the direct download, but there's a search for you if you want to use it. It cost a lot of money but I've heard it's great. Sabre_tooth[CZ] uses it, and so does a lot of other amazing skinners like Aquatta!
Skin Bases
Now that you've picked a program, you now need a base to make your skin with.
My base (pale):
My base (tan):
Leostereo's:
Minecraft's Steve: You can save the image with the link or the one here.
If you don't want to use these you can find some here!
Or Here!
Skinning Tips
Ok, so you have your program and your base. You can start skinning now. Now, I started out a terrible skinner. I'm still not very good, but I'm a lot better than I was! But, here's some basic tips so you'll start out better than me!
1. If you choose to do steve than don't keep the skin like that. You need to change the skin somewhat or it will look terrible and may be removed by a moderator.
2. If your doing eyelashes with black hair make the eyelashes either dark purple or dark blue that way it doesn't blend in together. You can also do the hair dark purple/blue, both work :)
3. If you're really new to skinning then I would start out not shading. Shading at first is really complicated and if you already aren't good then don't start out shading (Unless it's basic. Complex shading is really difficult) Just make a few skins without shading and then start trying :)
4. If you've made a few skins and feel like you are good at making the basic skin, then I would go to shading ^-^
5. If you are doing bows, bangs, glasses, or other hair accessories then you should probably use the hat Layer! At first it's hard to understand but then it gets easier the more you do it.
This might help:
6. If you have trouble understanding the parts use that above ^^^^^^ It really helps! Just save it by right clicking and doing "Save as..."
7. Remember to shade under sleeves and stuff. You don't have to but makes the skin more realistic
Skinning
Now, if you do all the tips and the picture to help you know the parts, your skin shouldn't look deformed. Now we come to the hard part....the real skinning part! You can make video game characters (Examples: Link, Zelda, Mario, Princess Peach, Mega Man, etc...) Or you can do things from pictures (Like a picture based of an anime girl or something like that) Another thing is just do ideas that come in your head. Sugarbun and Mymagic do that and their skins are great! (You should check them out...they're awesome!) And, it doesn't have to be girl skins. You can do that with boys. If you have trouble thinking of ideas then you can make a skin shop in the Forums, or you could make a blog for ideas. (You never know what someone else could come up with!) [WARNING: I don't know if making a blog for ideas is allowed anymore, so be sure to contact a moderator about it before you do. If you contact one please tell me what he says :)]
But, make sure that you do a good job, and that it looks like what you want it to!
Basic Shading
So, first you just make your base. Then you get a darker color of the thing you are shading. you start out just going to the side 4 pixels.
Then, you go down 8. Simple enough, huh?
and then you o to the left 3 and go up! that's as simple as it is.
Then you go to the next part. you just make a block around that!
You just keep doing that and you'll get it!
That's really it. The only thing to watch out for is the 2 pixels and the 1 pixel.
2 pixels: you just go like this:
easy right?
1 pixel: all you have to do is:
simple!
That's a very, VERY simple way to do it.
Another way (not as simple) is this way:
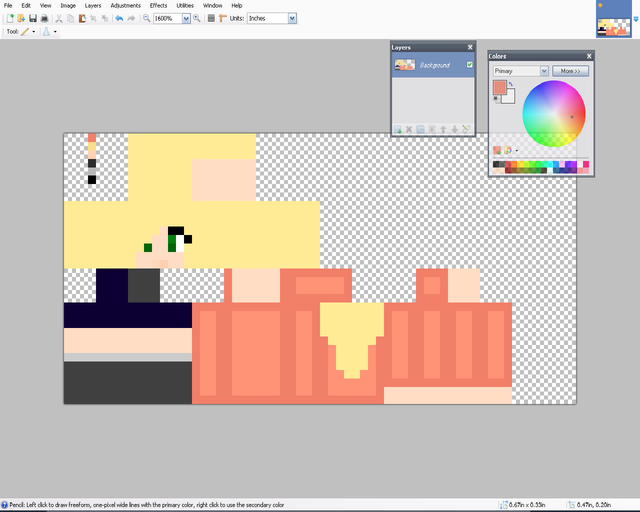
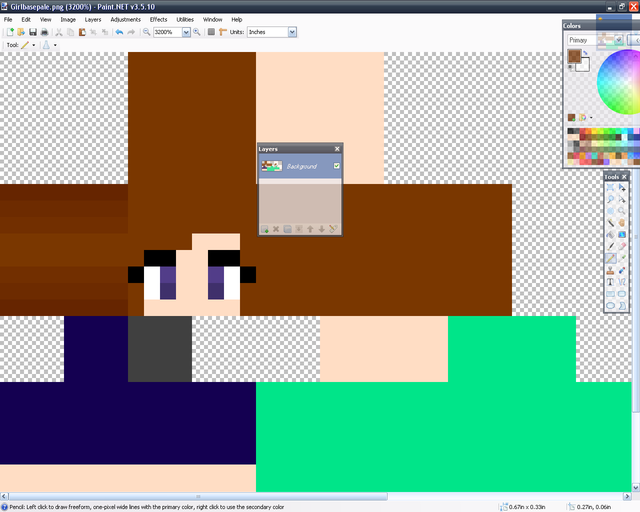
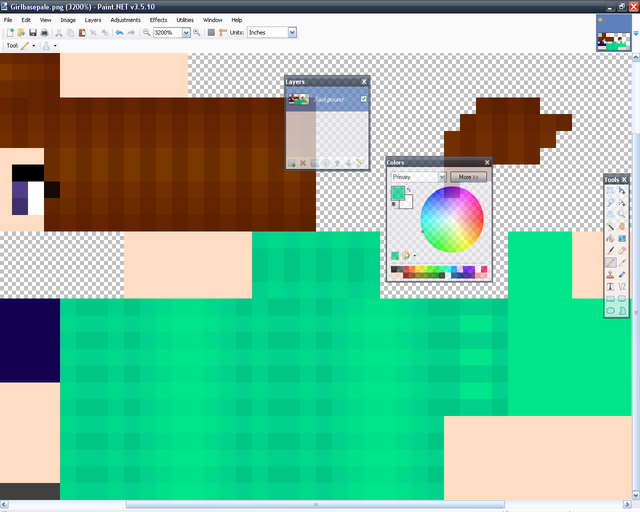
So, first you make your base. I'm doing a simple one for starters. You can do a lot more complex one but I wanted something simple. Note: I did the bangs shorter because I'm doing short hair. I would suggest doing that
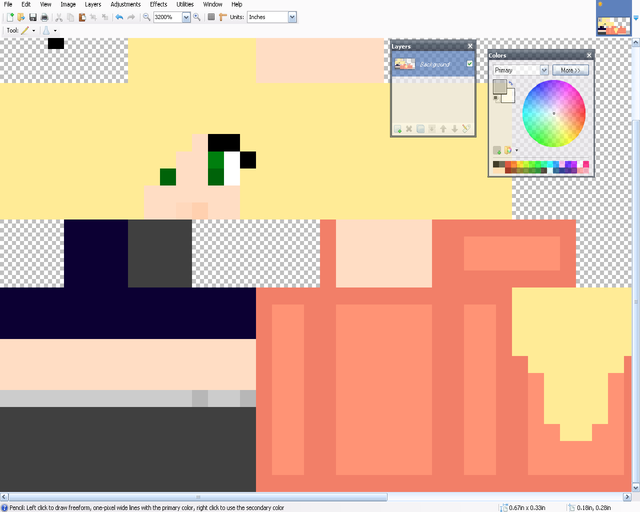
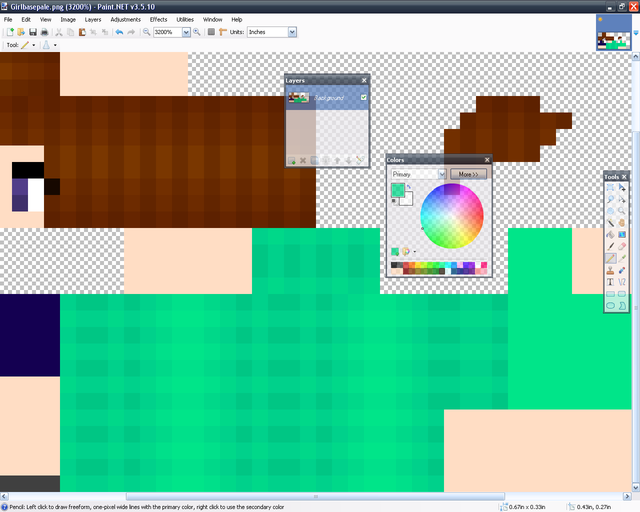
Let's start with the hair. You get a dark color and go darker like that. It's very simple.
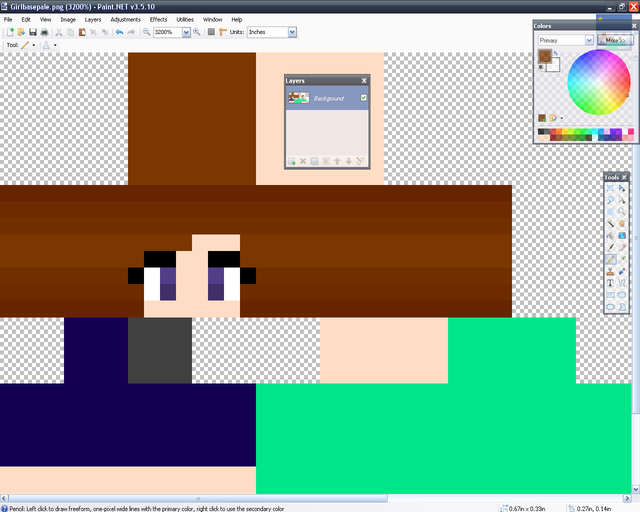
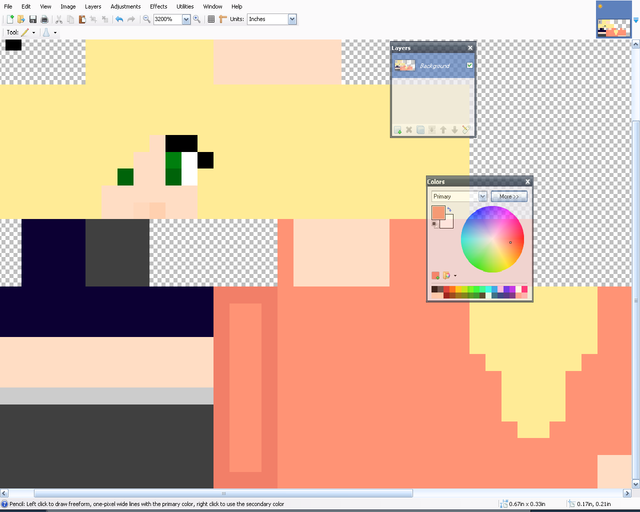
You just do that for the rest of the hair except the top. Note: Don't go through the eyelashes or any other part, just skip the pixel/pixels.
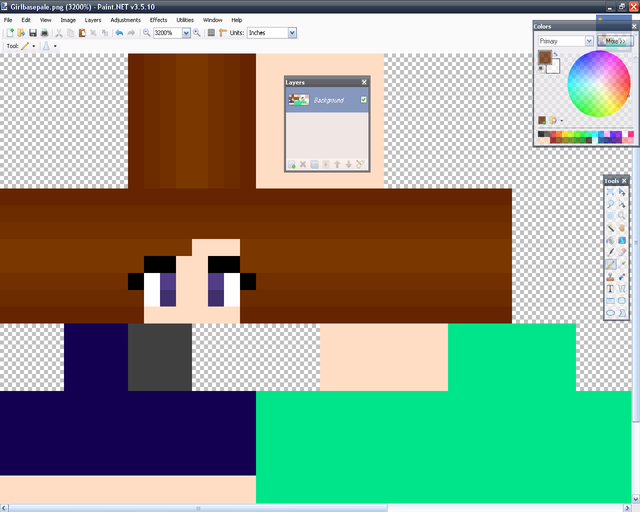
With the top of the hair, simple do it the other way. You don't have to it's just how I do it.
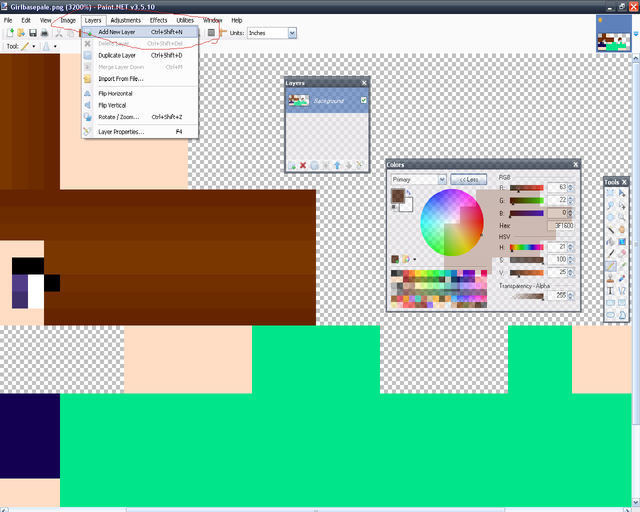
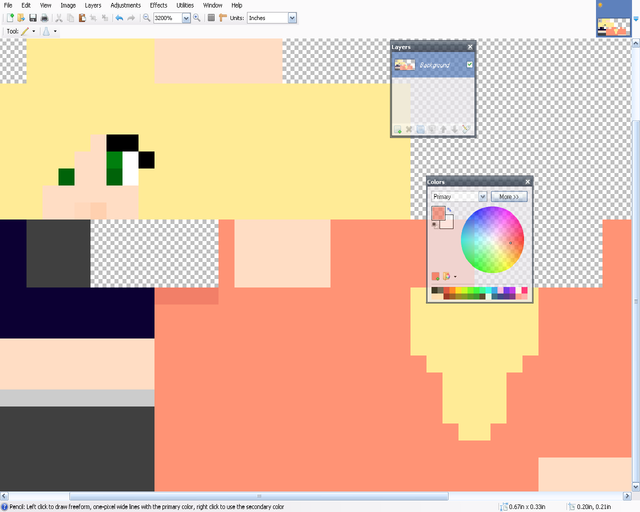
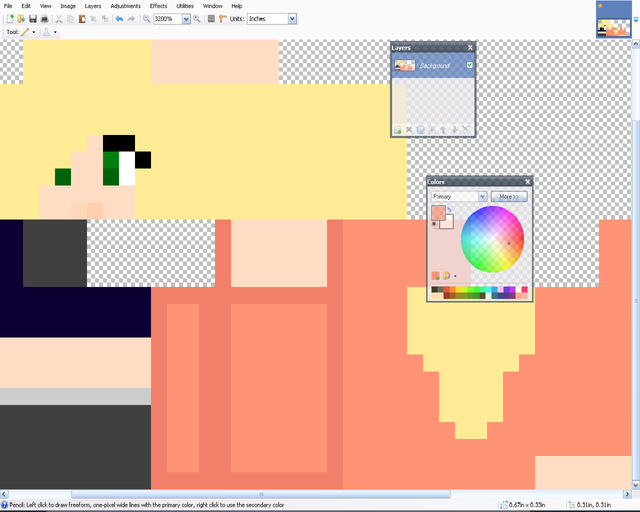
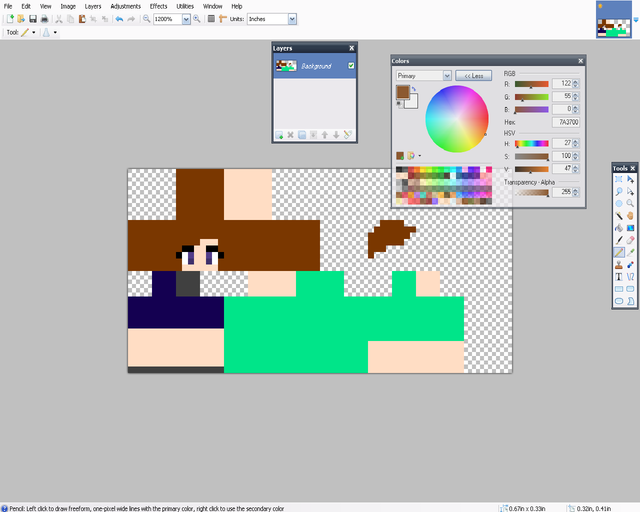
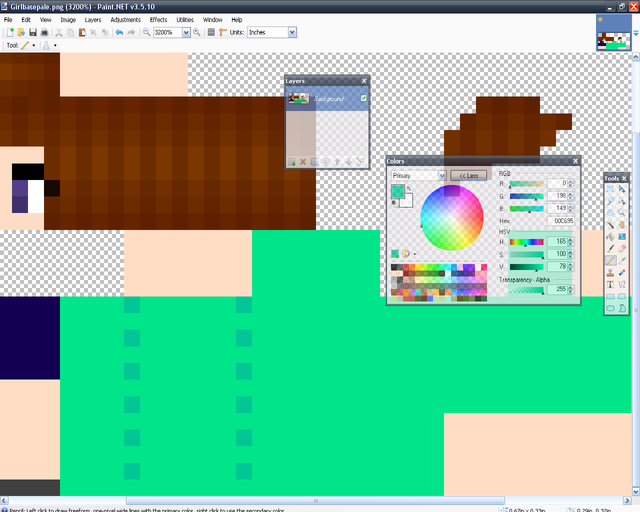
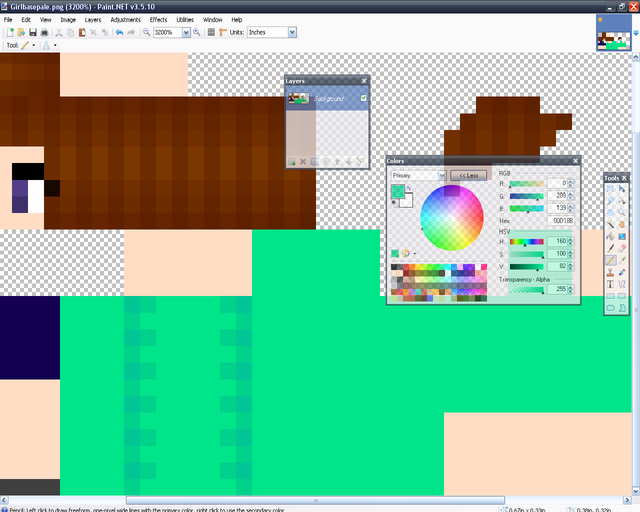
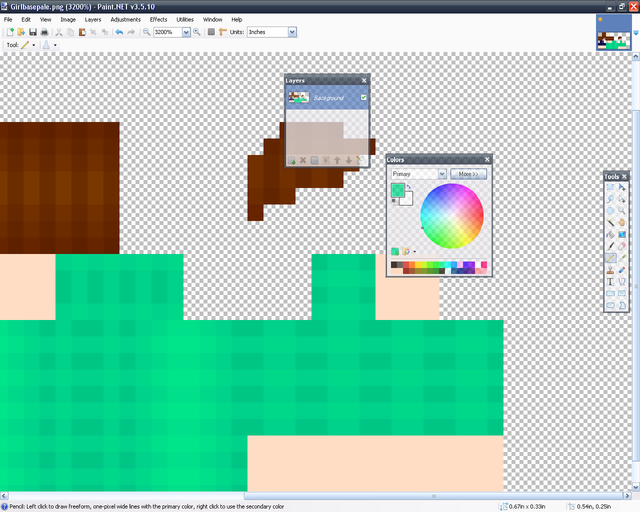
For this hair you need to make a new layer. It is right there where the red is circled.
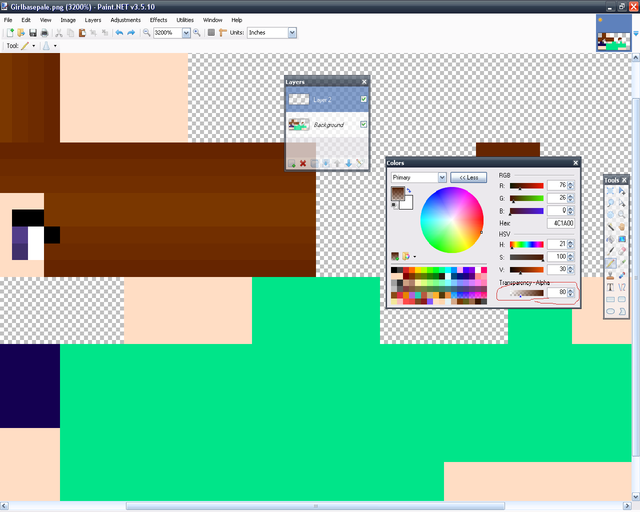
Make it transparent. I do around 70-98.
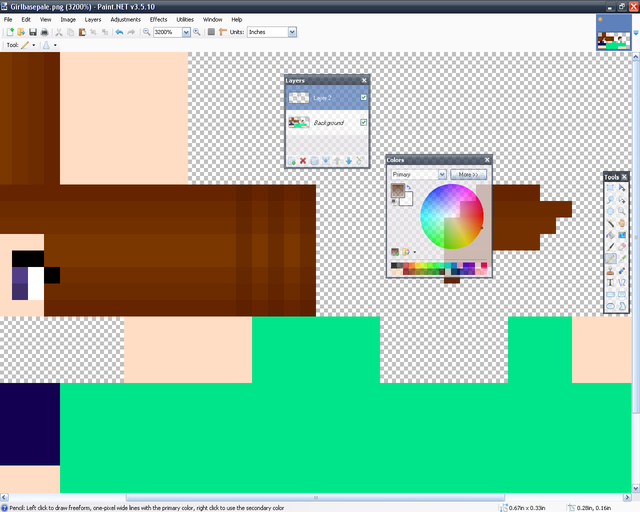
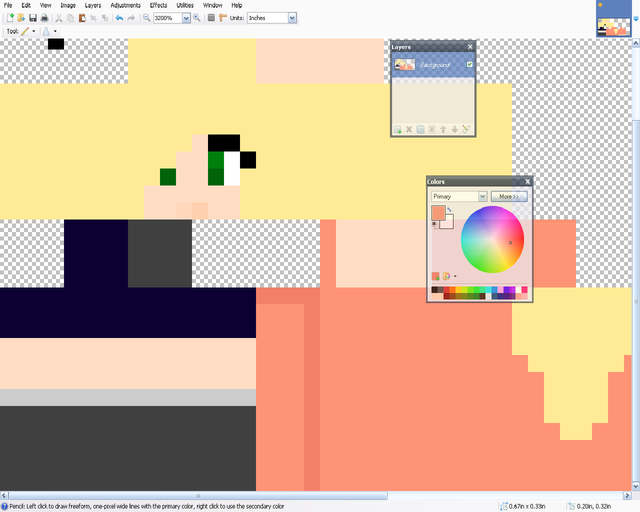
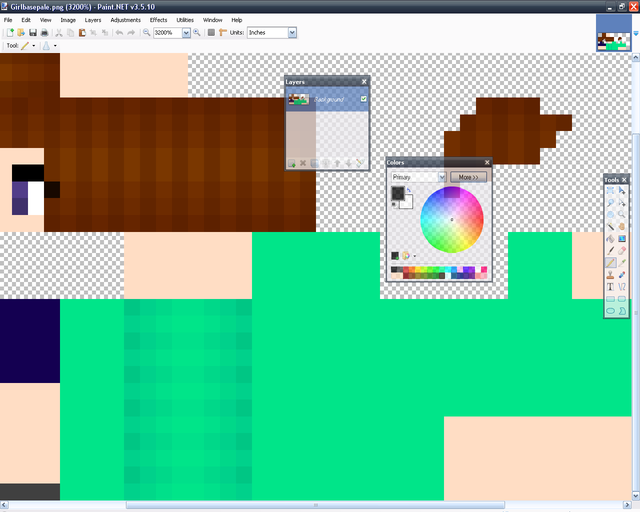
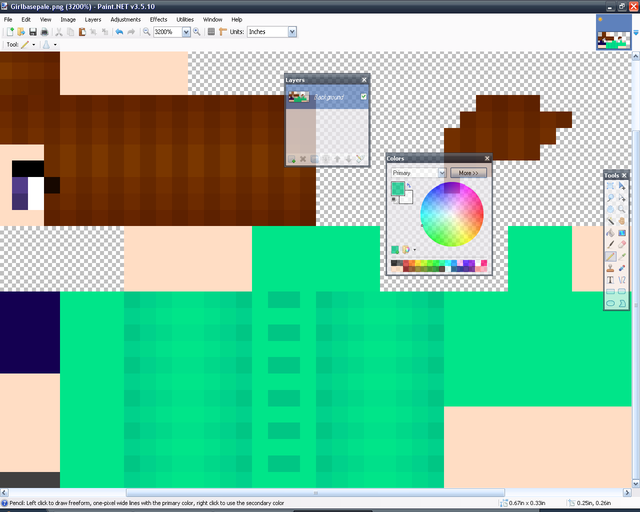
Then do lines every other.
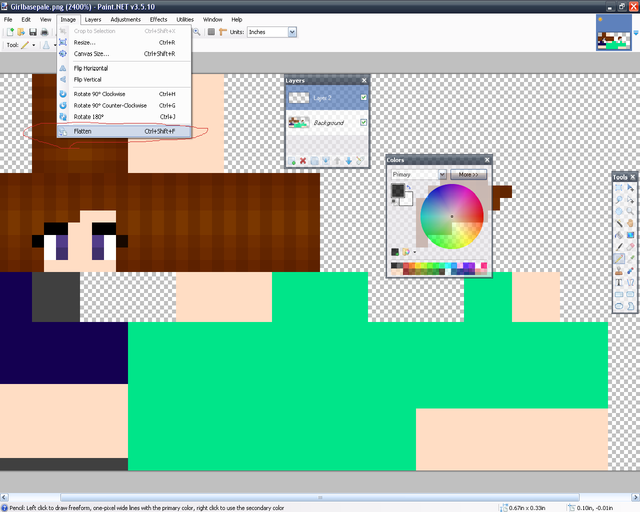
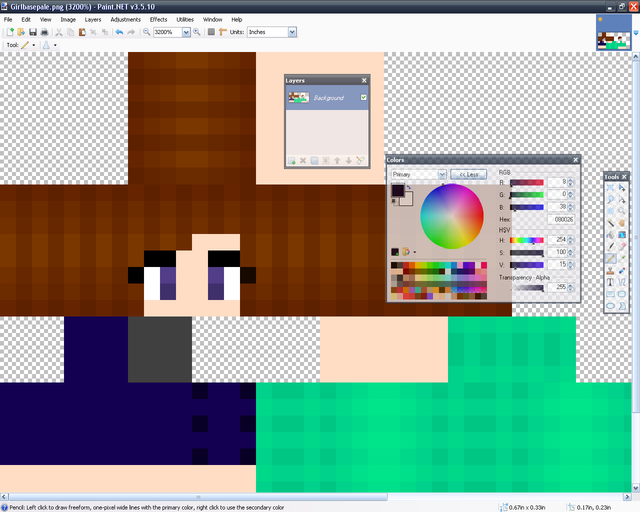
You keep doing that until you're finished. Then you have to flatten the image. it is where the red is circled. Note:You do the same shading with the bangs. We've just finished the hair!
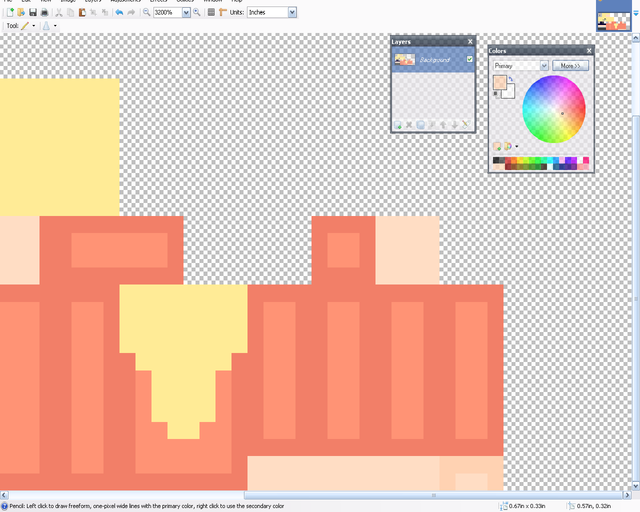
To do the chest you start out like this.
Then you do like this! it's very simple, really. You just keep doing this until you get the final product

Tada! But...the darkest color looks a little to blue for me...I'm gonna change that.
Tada! Now that's perfect! You do the exact same thing with the back.

See, you can copy and paste it or copy the colors and do it again.
Next is the inside of the shirt. You do dots like this.
Then you go around it like this!

Then you take the next color and finish up!
Then you just do the exact same thing on the other side.
Then you do the exact same thing with that part. Now to the sleeves!
You start out doing simple dots like that.
Then you kinda....outline? it like that.
Then you just fill the rest in! Very simple.
Then you just do the rest like that. Note: the elbow goes the exact same.
Now to the shorts. You do the exact same thing that you do with the sleeves. You put dots on every other spot and then outline, and fill.

See, you do the same thing! Remember, don't make the contrast on the shorts too much because then it won't look very good.
Shoe shading is simple. On the bottom of the shoe make it dark. The center the darkest, remember that the bottom of the shoe is where people are walking so it's gonna be dark. On the sides just do something like that. If you are doing boots or something more do the same shading that I showed you with the sleeves and shorts.
Then with the hands, and legs you do the same shading that you do with the sleeves. On the neck you just make a block, you don't need much detail there. on the face just do what you did with the hair. Only no layers or transparency.
Posting the Skin
Ok, so when posting the skin (if it's off of a picture...) you should give the reference pic. Maybe say why you made the skin, and put a signature at the bottom like:
~CuteMurphy
Well...sadly, that's it. I hope you enjoyed it, and I hope it helped!


Thank you guys so much! I'm on the hot list, and homepage!
Suggested Programs: In this section I have links to most of the downloads and programs that I suggest using! If you have any suggestions please comment!
Skin Bases: In this section I have links to my skin base, leostereo's skin base, and just the normal steve. If you don't like any of those you can click on the links I have to skin base searchs from PMC!
Skinning Tips: In this section I have important tips that will really help you to start skinning! Be sure to check them out :)
Skinning: In this section I try to help you come up with what to skin!
Basic Shading: Here I have 2 shading tutorials, the first is VERY simple, and the second one is a little trickier but both come out looking way better than it unshaded and are fairly simple :)
Posting the Skin: Here I recommend how to post your skins, it isn't really that helpful or necessary, but I thought I might as well :)
Suggested Programs
Ok, there are lots of programs you can use. There really isn't a best one overall, because everyone is different.
MCSkin3D: It's a highly suggested program for skinners, the parts are labeled and there's a preview, easy to use and helpful. I don't use it though. [WARNING: It does not work on Mac, so please don't try :)]
Paint.Net: It's really good, simple, easy to use and awesome! I use it so of course I'm gonna suggest it. Lots of good skinners use it like Leostereo. I would highly suggest this one, but everyone is different :) [WARNING: It does not work on Mac, so please don't try :) but, if you would like to try and find on for the mac click here!]
Gimp: It's basically a free Photoshop. Mymagic uses it and she's awesome. Haven't used it so I don't know how hard or easy it is but lots of people use it and make good skins.
PhotoShop: I don't have a link to the direct download, but there's a search for you if you want to use it. It cost a lot of money but I've heard it's great. Sabre_tooth[CZ] uses it, and so does a lot of other amazing skinners like Aquatta!
Skin Bases
Now that you've picked a program, you now need a base to make your skin with.
My base (pale):
My base (tan):
Leostereo's:
Minecraft's Steve:
 You can save the image with the link or the one here.
If you don't want to use these you can find some here!
Or Here!
Skinning Tips
Ok, so you have your program and your base. You can start skinning now. Now, I started out a terrible skinner. I'm still not very good, but I'm a lot better than I was! But, here's some basic tips so you'll start out better than me!
1. If you choose to do steve than don't keep the skin like that. You need to change the skin somewhat or it will look terrible and may be removed by a moderator.
2. If your doing eyelashes with black hair make the eyelashes either dark purple or dark blue that way it doesn't blend in together. You can also do the hair dark purple/blue, both work :)
3. If you're really new to skinning then I would start out not shading. Shading at first is really complicated and if you already aren't good then don't start out shading (Unless it's basic. Complex shading is really difficult) Just make a few skins without shading and then start trying :)
4. If you've made a few skins and feel like you are good at making the basic skin, then I would go to shading ^-^
5. If you are doing bows, bangs, glasses, or other hair accessories then you should probably use the hat Layer! At first it's hard to understand but then it gets easier the more you do it.
This might help:

6. If you have trouble understanding the parts use that above ^^^^^^ It really helps! Just save it by right clicking and doing "Save as..."
7. Remember to shade under sleeves and stuff. You don't have to but makes the skin more realistic
Skinning
Now, if you do all the tips and the picture to help you know the parts, your skin shouldn't look deformed. Now we come to the hard part....the real skinning part! You can make video game characters (Examples: Link, Zelda, Mario, Princess Peach, Mega Man, etc...) Or you can do things from pictures (Like a picture based of an anime girl or something like that) Another thing is just do ideas that come in your head. Sugarbun and Mymagic do that and their skins are great! (You should check them out...they're awesome!) And, it doesn't have to be girl skins. You can do that with boys. If you have trouble thinking of ideas then you can make a skin shop in the Forums, or you could make a blog for ideas. (You never know what someone else could come up with!) [WARNING: I don't know if making a blog for ideas is allowed anymore, so be sure to contact a moderator about it before you do. If you contact one please tell me what he says :)]
But, make sure that you do a good job, and that it looks like what you want it to!
Basic Shading
So, first you just make your base. Then you get a darker color of the thing you are shading. you start out just going to the side 4 pixels.

Then, you go down 8. Simple enough, huh?

and then you o to the left 3 and go up! that's as simple as it is.

Then you go to the next part. you just make a block around that!

You just keep doing that and you'll get it!

That's really it. The only thing to watch out for is the 2 pixels and the 1 pixel.
2 pixels: you just go like this:
easy right?

1 pixel: all you have to do is:
simple!

That's a very, VERY simple way to do it.
Another way (not as simple) is this way:

So, first you make your base. I'm doing a simple one for starters. You can do a lot more complex one but I wanted something simple. Note: I did the bangs shorter because I'm doing short hair. I would suggest doing that

Let's start with the hair. You get a dark color and go darker like that. It's very simple.

You just do that for the rest of the hair except the top. Note: Don't go through the eyelashes or any other part, just skip the pixel/pixels.

With the top of the hair, simple do it the other way. You don't have to it's just how I do it.

For this hair you need to make a new layer. It is right there where the red is circled.

Make it transparent. I do around 70-98.

Then do lines every other.

You keep doing that until you're finished. Then you have to flatten the image. it is where the red is circled. Note:You do the same shading with the bangs. We've just finished the hair!

To do the chest you start out like this.

Then you do like this! it's very simple, really. You just keep doing this until you get the final product

Tada! But...the darkest color looks a little to blue for me...I'm gonna change that.

Tada! Now that's perfect! You do the exact same thing with the back.

See, you can copy and paste it or copy the colors and do it again.

Next is the inside of the shirt. You do dots like this.

Then you go around it like this!

Then you take the next color and finish up!

Then you just do the exact same thing on the other side.

Then you do the exact same thing with that part. Now to the sleeves!

You start out doing simple dots like that.

Then you kinda....outline? it like that.

Then you just fill the rest in! Very simple.

Then you just do the rest like that. Note: the elbow goes the exact same.

Now to the shorts. You do the exact same thing that you do with the sleeves. You put dots on every other spot and then outline, and fill.

See, you do the same thing! Remember, don't make the contrast on the shorts too much because then it won't look very good.

Shoe shading is simple. On the bottom of the shoe make it dark. The center the darkest, remember that the bottom of the shoe is where people are walking so it's gonna be dark. On the sides just do something like that. If you are doing boots or something more do the same shading that I showed you with the sleeves and shorts.

Then with the hands, and legs you do the same shading that you do with the sleeves. On the neck you just make a block, you don't need much detail there. on the face just do what you did with the hair. Only no layers or transparency.
Posting the Skin
Ok, so when posting the skin (if it's off of a picture...) you should give the reference pic. Maybe say why you made the skin, and put a signature at the bottom like:
~CuteMurphy
Well...sadly, that's it. I hope you enjoyed it, and I hope it helped!


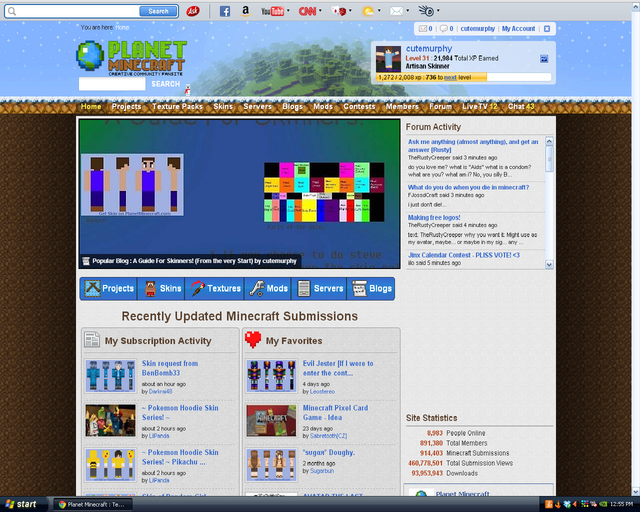
Thank you guys so much! I'm on the hot list, and homepage!

| Credit | all of the programs, everyone's bases |
| Tags |
2 Update Logs
Update #2 : by CuteMurphy 03/06/2014 6:56:35 pmMar 6th, 2014
+ Table of Contents
+ Edited Suggested Programs
+ Added links to all pics
+ Edited Skinning Tips
+ Changed intro
+ Edited Skin bases a little bit
+ Edited Suggested Programs
+ Added links to all pics
+ Edited Skinning Tips
+ Changed intro
+ Edited Skin bases a little bit
LOAD MORE LOGS
tools/tracking
1901664
6
a-small-guide-for-beginner-skinners

![Interview: MayaCookieGirl [#1] Minecraft Blog](https://static.planetminecraft.com/files/resource_media/screenshot/1529/interviewwithmaya9166786_thumb.jpg)


![°αshℓєy° My Hair Shading Tutorial! [ 70 Subs Special] [ Popreel Witch Was Found After A Life Of Steves Contest Thing :P ]](https://static.planetminecraft.com/files/resource_media/screenshot/1440/small/yutrytuuuustealdisaskmehfurstbefurudownload8187369_thumb.jpg)

 bigotato
 ApparentlySkilled
 IKadekDwi
 CrystalRuby
 Octogamer
 LanceP501
 man of armageddon
 mega7
mega7 Riseabove089


 illystray

 pathisgamer
Create an account or sign in to comment.