


Published Apr 22nd, 2020, 4/22/20 11:03 am
- 17,513 views, 4 today
- 2,204 downloads, 1 today
Built on server
 Blueprint Creative ⮞ A Realism Server ⮞ 1.15.21.20 Creative Server30k 24x 6
 Blueprint Server
5/30/21 10:22
• posted 3/23/18 8:02
Blueprint Server
5/30/21 10:22
• posted 3/23/18 8:02
310
New Zealand v 1.0
This first release/showcase of our New Zealand Project is an 8k by 8k section of a larger 30k x 30k continent based on an area in Southern New Zealand. Our goal for this project is to create a more perfect form of realism, incorporating vast terrain into environmentally integrated infrastructure and architecture. Although we've gotten as far as the start of an ultra-modern research facility, we haven't completed much more than that.
We've tried to solve the problem of height limit by making the trees a tad smaller while making the tree line lower as well. When you fly around the map, you feel immersed in endless amounts of terrain.
Terrain Process
The way I (Adam) make terrain at Blueprint is fairly interesting so I thought I'd detail it here. So I used to create polygon images of height maps off of a USGS Global data explorer and piece them together like puzzles, but that since has been closed
So, I'll detail my current process here:
1. I use terrain.party to download specific areas of terrain. I then piece each height map together to form the larger terrain I was looking for. I use WorldPainter as most people would.
2. In order to blend, if the two "puzzle pieces" have straight vertical or horizontal edges, simply put them next to each other. However, if they are irregular edges, you should select the existing terrain and put it into a selection. That way, when you create the terrain with the new height map, go to brush settings and click "outside of selection". That way it doesn't affect current terrain.
You might have to play around to get the pieces to line up.
NOTE: Normally the terrain is in between a 1:10 - 1:12 scale to real life, depending on its real-life height. Mt. Everest would be like 1:20 but a terrain in real life that does not go above 256 meters could be 1:1. The terrain I do usually is right in the middle, like New Zealand, Idaho, or Washington State. This gives the best effect for Immersion.
3. Once all the terrain is all created, I open up google earth, google maps, and any images of that area I'm replicating. I then take ONE brush, just a simple linear ridge brush, and I start copying the ridge patterns to my best ability. I spent about a month on this section of the terrain because it's so large. Sometimes, if you're in less important areas, it's not worth going into complete detail.
4. Next, I look up a list of trees in the area and create different forest layers by grouping them together
5. I then set the terrain blocks. Normally, I set gravel above 40-45 degrees, some sort of lighter rock above 53 degrees, and for this map, I set cyan terracotta above 57 degrees so that it stood out the most. I also set mycelium in some areas to give terrain detail.
6. I play around with biomes, usually tundra, plains, forest, and savanna, to create different biomes at different layers. You'll notice in the terrain there are many biomes being used.
7. Next, I paint the river layers and then add the forest, usually not setting any forests on rocks (unless the terrain has that in real life)
8. Finally, I hand paint or use a global operation (depending on the season) to set the snow layer. After this, the map is ready to export!
Setting and Planning
The setting of the map is during the spring. In all the renders, you are able to see lush forests converging with lush green forests along winding and flowing creeks. This time of year in New Zealand is one of the most beautiful places in the world, which is why we chose this area of the world. Another benefit of this area is that it includes the Milford Sound: an epic gorge/fjord area that was featured in the Lord of the Rings. However, this area is not currently complete...

Here, you can see the effect the trees have on the prominence of the terrain.
The complete area is area #3. You will have access to parts of other areas that have not been detailed yet.

The Download Includes:
- Completed Central Otago Mountains
- Planned area in the valley of Queenstown
- Half of Lake Wakatipu
- Coronet Peak area
- Half Dome
- A piece of a research facility
The terrain is built in the Blueprint Resource pack. The map will not look as good in default because we use colored concretes as rock/stone textures!
You can download this here:
[style b=false i=false size=16px color=" var(--text-link)" bgcolor=#36393f]https://drive.google.com/file/d/1xOxcblsX-bwGEYZXqcpldnduAV2nnLEo/view?usp=sharing[/style]
Points of Interest:
Snowy/Rocky Mountains by lake: -1016 133 4119
More Snowy lake area: -990 126 3187
The area in Cover Render: -2442 56 2519
This map should help you get around:

This map is also available to view on the Blueprint Server! We've posted this map to our server so you can find the information above. The map is better viewed on our server because we have warps, dynmap, and people to help you get around.
/warp NewZealand:Mountains
Thanks, RyerTheGreat, for the renders!
Please leave comments and feedback. We hope you enjoy! :)
This first release/showcase of our New Zealand Project is an 8k by 8k section of a larger 30k x 30k continent based on an area in Southern New Zealand. Our goal for this project is to create a more perfect form of realism, incorporating vast terrain into environmentally integrated infrastructure and architecture. Although we've gotten as far as the start of an ultra-modern research facility, we haven't completed much more than that.
We've tried to solve the problem of height limit by making the trees a tad smaller while making the tree line lower as well. When you fly around the map, you feel immersed in endless amounts of terrain.
Terrain Process
The way I (Adam) make terrain at Blueprint is fairly interesting so I thought I'd detail it here. So I used to create polygon images of height maps off of a USGS Global data explorer and piece them together like puzzles, but that since has been closed
So, I'll detail my current process here:
1. I use terrain.party to download specific areas of terrain. I then piece each height map together to form the larger terrain I was looking for. I use WorldPainter as most people would.
2. In order to blend, if the two "puzzle pieces" have straight vertical or horizontal edges, simply put them next to each other. However, if they are irregular edges, you should select the existing terrain and put it into a selection. That way, when you create the terrain with the new height map, go to brush settings and click "outside of selection". That way it doesn't affect current terrain.
You might have to play around to get the pieces to line up.
NOTE: Normally the terrain is in between a 1:10 - 1:12 scale to real life, depending on its real-life height. Mt. Everest would be like 1:20 but a terrain in real life that does not go above 256 meters could be 1:1. The terrain I do usually is right in the middle, like New Zealand, Idaho, or Washington State. This gives the best effect for Immersion.
3. Once all the terrain is all created, I open up google earth, google maps, and any images of that area I'm replicating. I then take ONE brush, just a simple linear ridge brush, and I start copying the ridge patterns to my best ability. I spent about a month on this section of the terrain because it's so large. Sometimes, if you're in less important areas, it's not worth going into complete detail.
4. Next, I look up a list of trees in the area and create different forest layers by grouping them together
5. I then set the terrain blocks. Normally, I set gravel above 40-45 degrees, some sort of lighter rock above 53 degrees, and for this map, I set cyan terracotta above 57 degrees so that it stood out the most. I also set mycelium in some areas to give terrain detail.
6. I play around with biomes, usually tundra, plains, forest, and savanna, to create different biomes at different layers. You'll notice in the terrain there are many biomes being used.
7. Next, I paint the river layers and then add the forest, usually not setting any forests on rocks (unless the terrain has that in real life)
8. Finally, I hand paint or use a global operation (depending on the season) to set the snow layer. After this, the map is ready to export!
Setting and Planning
The setting of the map is during the spring. In all the renders, you are able to see lush forests converging with lush green forests along winding and flowing creeks. This time of year in New Zealand is one of the most beautiful places in the world, which is why we chose this area of the world. Another benefit of this area is that it includes the Milford Sound: an epic gorge/fjord area that was featured in the Lord of the Rings. However, this area is not currently complete...
Here, you can see the effect the trees have on the prominence of the terrain.
The complete area is area #3. You will have access to parts of other areas that have not been detailed yet.
The Download Includes:
- Completed Central Otago Mountains
- Planned area in the valley of Queenstown
- Half of Lake Wakatipu
- Coronet Peak area
- Half Dome
- A piece of a research facility
The terrain is built in the Blueprint Resource pack. The map will not look as good in default because we use colored concretes as rock/stone textures!
You can download this here:
[style b=false i=false size=16px color=" var(--text-link)" bgcolor=#36393f]https://drive.google.com/file/d/1xOxcblsX-bwGEYZXqcpldnduAV2nnLEo/view?usp=sharing[/style]
Points of Interest:
Snowy/Rocky Mountains by lake: -1016 133 4119
More Snowy lake area: -990 126 3187
The area in Cover Render: -2442 56 2519
This map should help you get around:
This map is also available to view on the Blueprint Server! We've posted this map to our server so you can find the information above. The map is better viewed on our server because we have warps, dynmap, and people to help you get around.
/warp NewZealand:Mountains
Thanks, RyerTheGreat, for the renders!
Please leave comments and feedback. We hope you enjoy! :)
| Credit | Adam for terrain, Ryer for renders and building, MCB18 for roads. |
| Progress | 100% complete |
| Tags |
4562091
2
![Minecraft Fantasy Castle [DOWNLOAD] - Fairytale Castle in Guizhou Minecraft Map & Project](https://static.planetminecraft.com/files/image/minecraft/project/2020/185/13192161-castlethumbnail_s.jpg)
![[Argon] Minecraft Realistic City and Mountains | 8,000 block road! | Blueprint Creative Minecraft Map & Project](https://static.planetminecraft.com/files/image/minecraft/project/2020/835/13037135-argonmain_s.jpg)


![Phain – Game Board of the Ancients [6000 x 6000 multiple biomes survival map, 923 plots] | Theme - Hexagons [1.8+]](https://static.planetminecraft.com/files/resource_media/screenshot/1617/small/w010108309_thumb.jpg)
![Azorzeia - Gardens of the Wild [6000 x 6000 map] | Theme - gardens [1.7]](https://static.planetminecraft.com/files/resource_media/screenshot/1629/small/azorzeia10360838_thumb.jpg)


 SciChamp
 ScotsMiser
 AlphaGrace
 CrystalRuby
 TwoManBuilds
![🌄Beraxsos, 8k, The Highlands [1.20.2+, Survival Friendly, Download, Java , Minecraft World] Minecraft Map & Project](https://static.planetminecraft.com/files/image/minecraft/project/2024/458/17815147-thumbnail_s.jpg)
 McMeddon
 PurpleMCGamer14_YT
 LevisPoppy
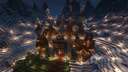

Create an account or sign in to comment.
Sorry for the late reply :)