


54
Okay! Today I will be showing you how to make a Lemon Grenade this is from EPBOT I don't mean any harm I though it was really cool and I wanted to share it with the PMC Community! Please support and check out EPBOT if you like this!
You can find them at EPBOT
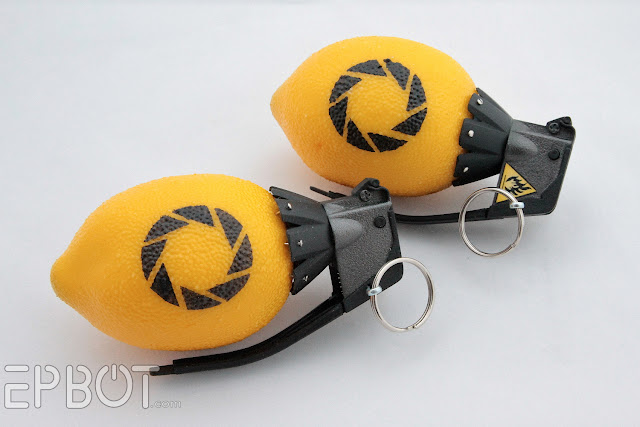
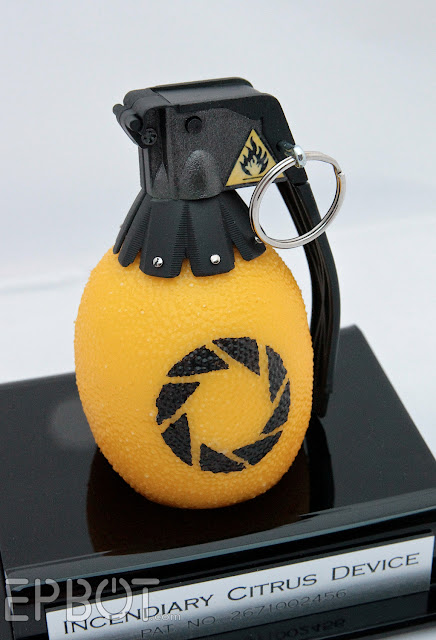
This tutorial will show you how to make one of these:
Okay you may have seen the EPBOT logo on the image if not you might want to get your eye sight checked! This image is from the original post. I got the image off EPBOT. This is not my idea or my tutorial this is one I found on EPBOT and I am just simply remaking it for you in a easier place for weirdos of the Minecraft universe.
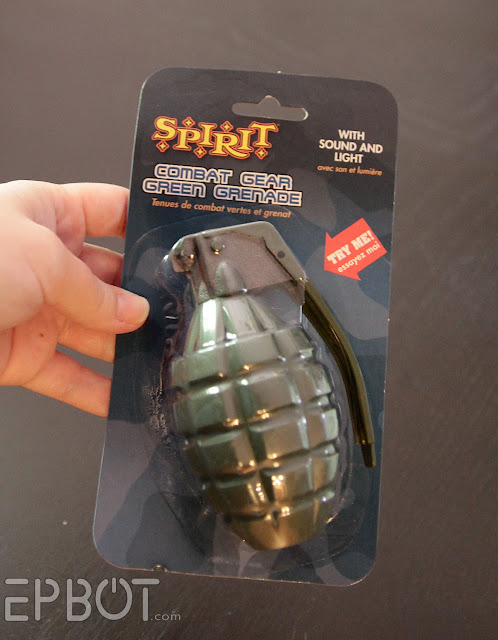
Plastic toy Grenade (The one with a soundboard)
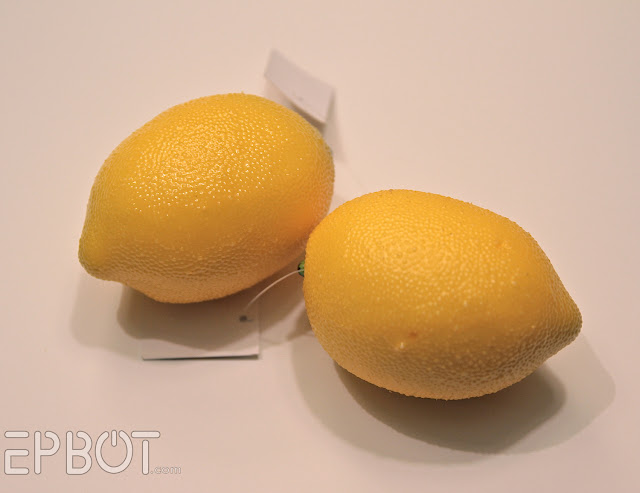
A fake lemon (Best ones from wal-mart)
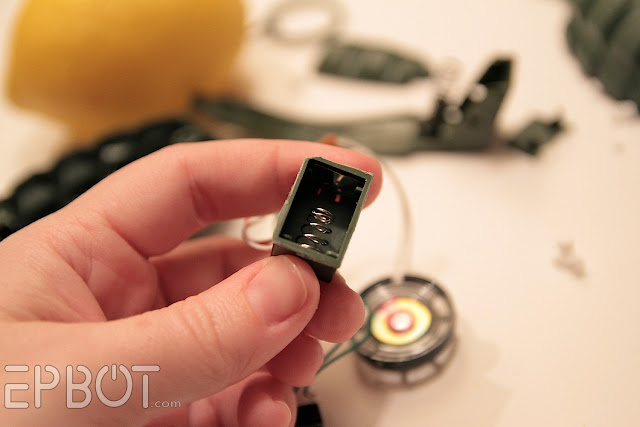
Disassemble the grenade by removing all the tiny screws (but don't lose them!), and slide out the switch mechanism and small speaker:
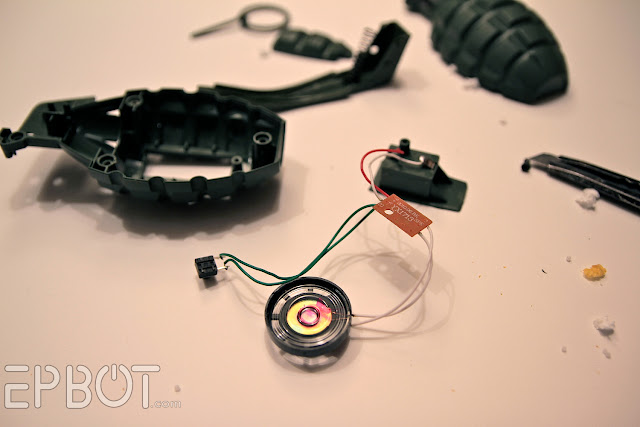
You're going to be tucking the battery compartment inside your lemon, so you want to get it as small as possible. That meant snipping off the plastic side pieces for this one, resulting in this tiny battery box:
Using a slim utility blade, start cutting a square hole into the top of your lemon, pausing every now and then to check the fit:
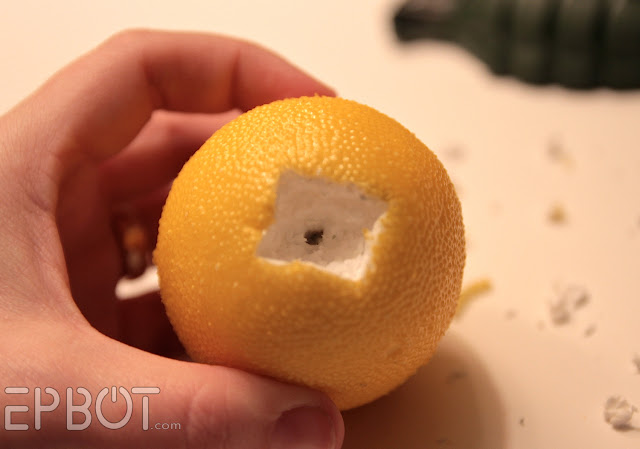
The inside of the lemon is made of Styrofoam, so after you slice through the thick skin you might want to switch to needle-nosed pliers to pull the crumbly foam pieces out, as opposed to trying to slice them your blade.
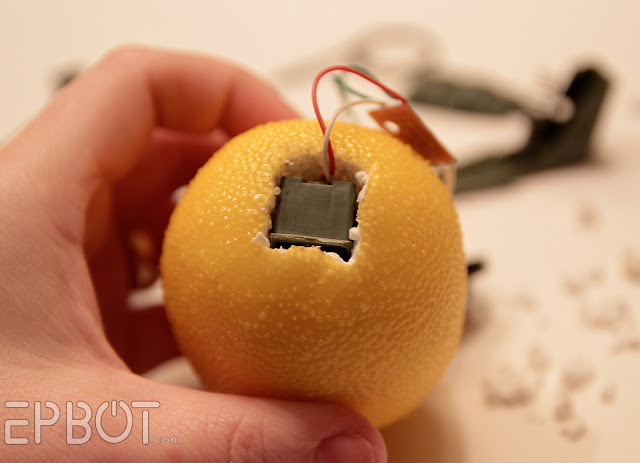
Keep checking the fit for your battery box; you want it to slide in perfectly, like so:
There's a concrete weight in the center of these lemons, so your blade might hit it as you're cutting down. Fortunately there was still enough room for the battery box to fit, though.
Okay, now on to the grenade top:
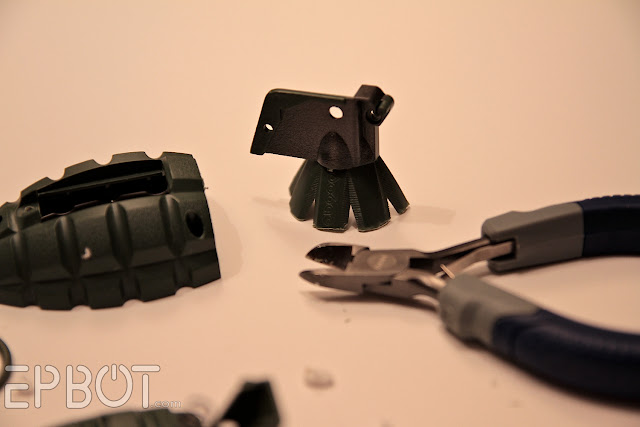
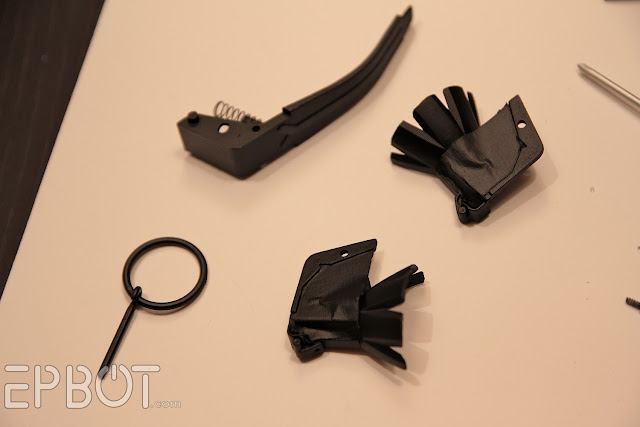
Snip off the top of the grenade with pliers. Do it one side at a time, and the plastic is easily bent and snipped. Try to keep those prong bits all the same length, if you can. Use a metal file to smooth out the sharp corners and any jagged edges.
This grenade was Army Green, so if yours is tape off the gunmetal sections and spray-paint the rest matte black, including the grenade handle:
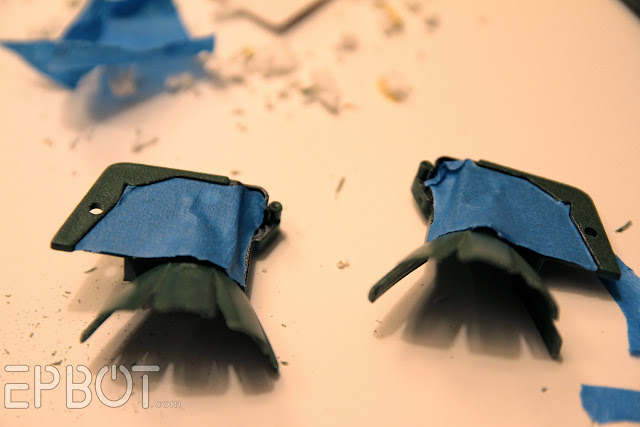
After Painting:
(This is before the painter's tape was removed; the inside areas on the head are still gunmetal gray.)
Now comes the tricky part: putting it all together.
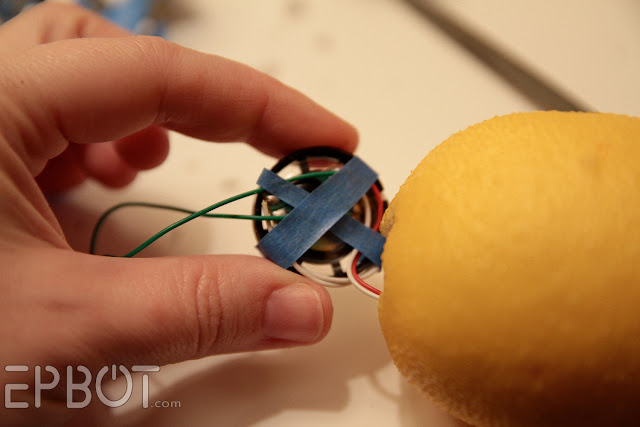
Insert the battery box inside your lemon, and then use a sliver of tape to secure the excess wires to the underside of the grenade speaker. This speaker is going to sit on top of the lemon, directly over your battery box, and it will be held in place by the grenade topper.
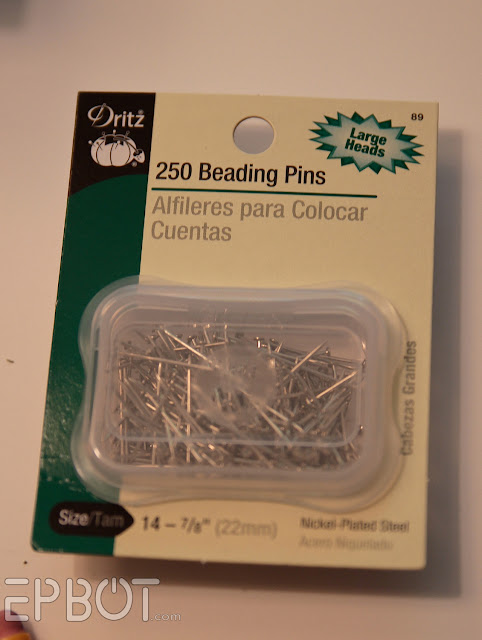
So what holds the plastic grenade topper in place? Pins, like these:
You'll need to drill tiny holes in the "prongs" of your grenade head for the pins to fit through. Enter your trusty Dremel:

Here the first hole is being drilled, I can assure you: it's not hard. The plastic is easy to punch through, so the only tricky part is making sure you angle your drill bit so the pins will be guided down into the lemon at a roughly 45 degree angle.
To show you how this is all going to fit together, The half of the grenade topper is being held in place, with the speaker and wires tucked underneath:
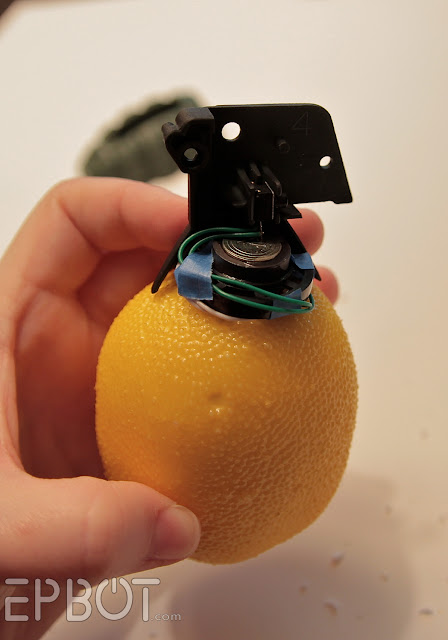
Put your grenade topper together before attaching it to your lemon, though; this picture is only to give you an idea of the fit. You'll also need to re-insert the switch back inside the handle - don't forget, or your lemon grenade won't go boom!
It's just a matter of holding the grenade topper in place, wires and speaker nicely tucked underneath, and inserting the pins through the topper's prongs into the lemon. (Get a second person to help you.) Because the pins will all be inserted at an angle, there's no way the top can be pulled off without removing them. (If the pins are to long just shorten them a bit.)
Once you've got the grenade top secured to the lemon, it's time to decorate.
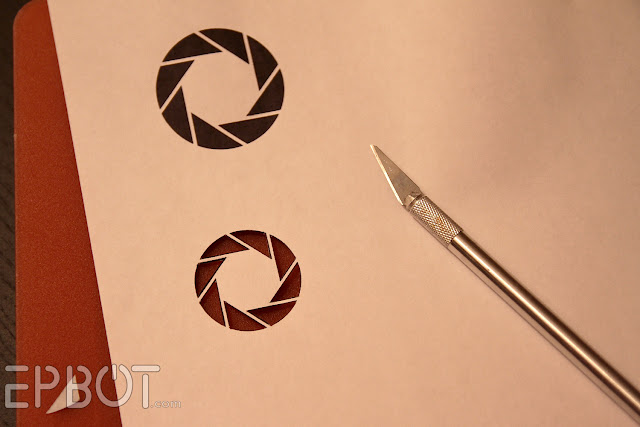
Print the Aperture logo on plain paper, and then use a craft knife to cut it out for a stencil.
Using a stencil on a bumpy rounded lemon isn't the easiest thing to do so use adhesive putty to stick the paper down on 2 sides and then held each panel down with your fingers and pounce acrylic paint on with a stiff brush.
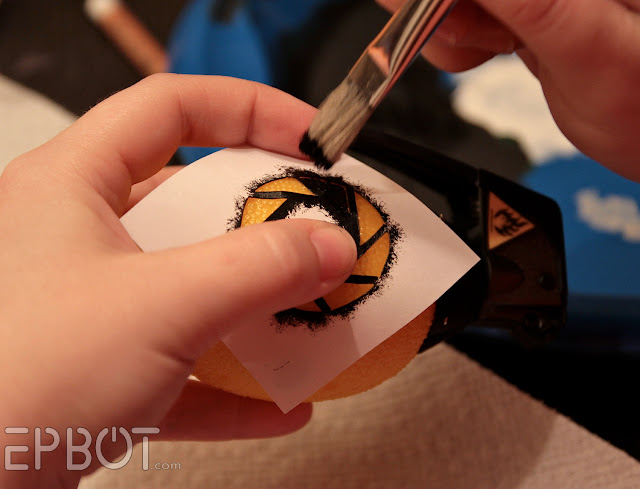
As with all stencils, be sure to only pounce straight up and down, and watch your fingers: they'll get paint on them, so you don't want that getting smeared on the lemon.
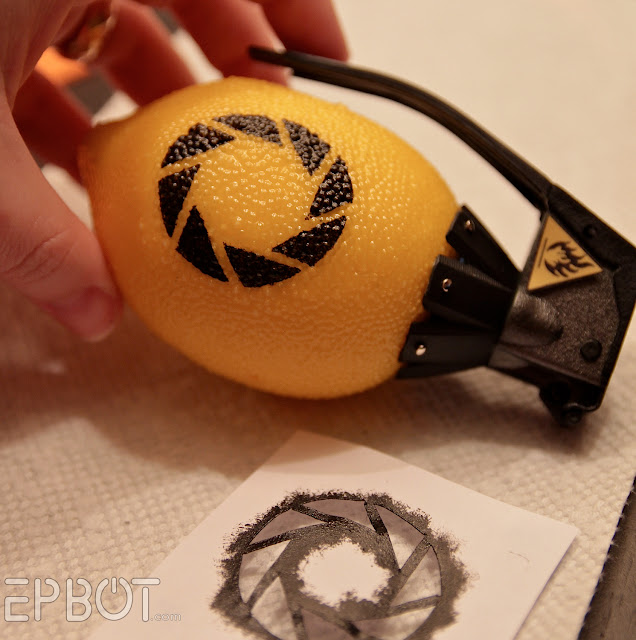
Also for extra detail you can find a little yellow flammable packaging symbol and print it out then laminate it and stick it on top with glue.
If you arn't happy with the plastic pin that came with the toy grenade you can replace it with a stainless steel cotter pin (You can find them at the hardware store for not much) and a key chain ring. That's completely optional, though.
This is a little tutorial that I found on EPBOT I don't mean any harm I just wanted to promote and support EPBOT without spamming chat!
EPBOT's Website:
EPBOT
Okay that is all for now if you like it please check out EPBOT for more tutorials on this sort of stuff!!!!!!!
You can find them at EPBOT
This tutorial will show you how to make one of these:
Okay you may have seen the EPBOT logo on the image if not you might want to get your eye sight checked! This image is from the original post. I got the image off EPBOT. This is not my idea or my tutorial this is one I found on EPBOT and I am just simply remaking it for you in a easier place for weirdos of the Minecraft universe.
Plastic toy Grenade (The one with a soundboard)
A fake lemon (Best ones from wal-mart)
Disassemble the grenade by removing all the tiny screws (but don't lose them!), and slide out the switch mechanism and small speaker:
You're going to be tucking the battery compartment inside your lemon, so you want to get it as small as possible. That meant snipping off the plastic side pieces for this one, resulting in this tiny battery box:
Using a slim utility blade, start cutting a square hole into the top of your lemon, pausing every now and then to check the fit:
The inside of the lemon is made of Styrofoam, so after you slice through the thick skin you might want to switch to needle-nosed pliers to pull the crumbly foam pieces out, as opposed to trying to slice them your blade.
Keep checking the fit for your battery box; you want it to slide in perfectly, like so:
There's a concrete weight in the center of these lemons, so your blade might hit it as you're cutting down. Fortunately there was still enough room for the battery box to fit, though.
Okay, now on to the grenade top:
Snip off the top of the grenade with pliers. Do it one side at a time, and the plastic is easily bent and snipped. Try to keep those prong bits all the same length, if you can. Use a metal file to smooth out the sharp corners and any jagged edges.
This grenade was Army Green, so if yours is tape off the gunmetal sections and spray-paint the rest matte black, including the grenade handle:
After Painting:
(This is before the painter's tape was removed; the inside areas on the head are still gunmetal gray.)
Now comes the tricky part: putting it all together.
Insert the battery box inside your lemon, and then use a sliver of tape to secure the excess wires to the underside of the grenade speaker. This speaker is going to sit on top of the lemon, directly over your battery box, and it will be held in place by the grenade topper.
So what holds the plastic grenade topper in place? Pins, like these:
You'll need to drill tiny holes in the "prongs" of your grenade head for the pins to fit through. Enter your trusty Dremel:
Here the first hole is being drilled, I can assure you: it's not hard. The plastic is easy to punch through, so the only tricky part is making sure you angle your drill bit so the pins will be guided down into the lemon at a roughly 45 degree angle.
To show you how this is all going to fit together, The half of the grenade topper is being held in place, with the speaker and wires tucked underneath:
Put your grenade topper together before attaching it to your lemon, though; this picture is only to give you an idea of the fit. You'll also need to re-insert the switch back inside the handle - don't forget, or your lemon grenade won't go boom!
It's just a matter of holding the grenade topper in place, wires and speaker nicely tucked underneath, and inserting the pins through the topper's prongs into the lemon. (Get a second person to help you.) Because the pins will all be inserted at an angle, there's no way the top can be pulled off without removing them. (If the pins are to long just shorten them a bit.)
Once you've got the grenade top secured to the lemon, it's time to decorate.
Print the Aperture logo on plain paper, and then use a craft knife to cut it out for a stencil.
Using a stencil on a bumpy rounded lemon isn't the easiest thing to do so use adhesive putty to stick the paper down on 2 sides and then held each panel down with your fingers and pounce acrylic paint on with a stiff brush.
As with all stencils, be sure to only pounce straight up and down, and watch your fingers: they'll get paint on them, so you don't want that getting smeared on the lemon.
Also for extra detail you can find a little yellow flammable packaging symbol and print it out then laminate it and stick it on top with glue.
If you arn't happy with the plastic pin that came with the toy grenade you can replace it with a stainless steel cotter pin (You can find them at the hardware store for not much) and a key chain ring. That's completely optional, though.
This is a little tutorial that I found on EPBOT I don't mean any harm I just wanted to promote and support EPBOT without spamming chat!
EPBOT's Website:
EPBOT
Okay that is all for now if you like it please check out EPBOT for more tutorials on this sort of stuff!!!!!!!
| Credit | EPBOT |
| Tags |
tools/tracking
1872767
6
diy-portal-2-incendiary-device


 shackfu
 CrownDeluxe
 hotsuop
 KhakiKayaks
 -sweater-
 Papa Enny

 MegaMinerDL
 ItsAlexHimself_
Create an account or sign in to comment.