


35
I've came across a few people recently who are unsure how to use the 3D rendering program Chunky - made specifically for Minecraft.
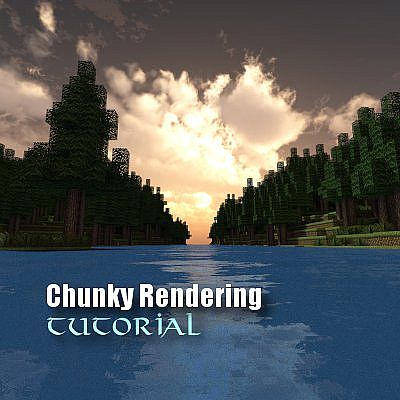
Chunky is a program that makes realistic images from areas of your choice (like the thumbnail picture).
DOWNLOADS UNDERNEATH TUTORIAL
So let's get started!
1. Upon your first time opening Chunky you will be prompted with a box named "Select World". Choose the world you are wanting to create a rendered image from. (Ignore all my worlds, I get bored xD)

2. So now after you've chose the correct world you will be using, the "Select World" box should disappear and Chunky will load a birds eye view of the map. What you'll want to do now is select a few chunks - this is simple just left click an area and it will highlight it in red. Try to select a large area since the renders look nicer with a background obviously.

3. Once you've highlighted a suitable area you'll want to click the "3D Render" tab on the right hand side then left-click the "New Scene" button and name your scene what ever you want . Chunky will now load up a small screen showing the chunks you have selected. Fly to a suitable place, using the ordinary Minecraft controls (WASD), where you get an angle that you think suits your build.

4. Now it's time to mess about and make everything better generally. Of course you could just hit start right now and get a decent image but there are ways to make it better. I'll start by adding a sky - you will need to download some skymaps to get these skies, I'll add some links to downloads at the bottom of this post. To add a sky, click on the sky tab then "Load Skymap".

5. I'm only going to show you how to add skymaps in this tutorial since everything else is simple. Your picture should now look like this! (Depending on your sky). Obviously this is simple stuff and doesn't look too great.

6. Once you've figured everything out and think you're ready to render the image return to the "General" tab, choose the size of the picture and hit "Start". Chunky will now start rendering the image.
7. Chunky will save the rendered image to the chosen directory, can be found by clicking "Open Scene Directory" on the "General" tab. Go find your image!
I HOPE THIS HELPS EVERYONE IN NEED OF HELP! THANKS FOR READING THROUGH THIS!
DOWNLOADS;
Chunky - http://www.minecraftforum.net/topic/63913-chunky-minecraft-mapping-and-rendering-tool/
Skymaps - http://chunky.llbit.se/index.php?title=Skymap
Chunky is a program that makes realistic images from areas of your choice (like the thumbnail picture).
DOWNLOADS UNDERNEATH TUTORIAL
So let's get started!
1. Upon your first time opening Chunky you will be prompted with a box named "Select World". Choose the world you are wanting to create a rendered image from. (Ignore all my worlds, I get bored xD)
2. So now after you've chose the correct world you will be using, the "Select World" box should disappear and Chunky will load a birds eye view of the map. What you'll want to do now is select a few chunks - this is simple just left click an area and it will highlight it in red. Try to select a large area since the renders look nicer with a background obviously.
3. Once you've highlighted a suitable area you'll want to click the "3D Render" tab on the right hand side then left-click the "New Scene" button and name your scene what ever you want . Chunky will now load up a small screen showing the chunks you have selected. Fly to a suitable place, using the ordinary Minecraft controls (WASD), where you get an angle that you think suits your build.
4. Now it's time to mess about and make everything better generally. Of course you could just hit start right now and get a decent image but there are ways to make it better. I'll start by adding a sky - you will need to download some skymaps to get these skies, I'll add some links to downloads at the bottom of this post. To add a sky, click on the sky tab then "Load Skymap".
5. I'm only going to show you how to add skymaps in this tutorial since everything else is simple. Your picture should now look like this! (Depending on your sky). Obviously this is simple stuff and doesn't look too great.
6. Once you've figured everything out and think you're ready to render the image return to the "General" tab, choose the size of the picture and hit "Start". Chunky will now start rendering the image.
7. Chunky will save the rendered image to the chosen directory, can be found by clicking "Open Scene Directory" on the "General" tab. Go find your image!
I HOPE THIS HELPS EVERYONE IN NEED OF HELP! THANKS FOR READING THROUGH THIS!
DOWNLOADS;
Chunky - http://www.minecraftforum.net/topic/63913-chunky-minecraft-mapping-and-rendering-tool/
Skymaps - http://chunky.llbit.se/index.php?title=Skymap
| Tags |
2080988
6


 RocketStudio
 CrystalRuby
 PufferFishGuy_22
 FantasyWaffle
 Amazing Zane
 Black_Cross
 PaintsplattersMC
 VocalMC
 Team UNNAMED
 Papa Enny

 Panda_Shark
 MaximusPrime23
 Bersek36
![[Guide] Setting up the Prism launcher: why and how to do it. Minecraft Blog](https://static.planetminecraft.com/files/image/minecraft/blog/2024/115/17843525-prismlogo_s.jpg)
 ShelLuser
 voktorka
Create an account or sign in to comment.