


278
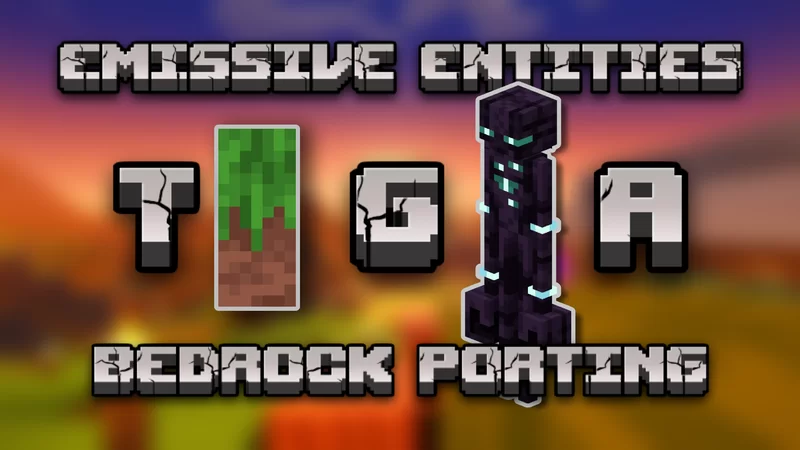
In todays tutorial I’ll be showing how I added FishStack’s grass side & emissive entities (spiders, drowns, enderman, etc) to Minecraft Bedrock. I will be using Photopea (free online Photoshop), but other editors should work.
NOTE: If you plan on publishing this pack or sharing it with anyone you should make sure to ask for permission and credit them as required. If it just a personal pack still make sure to credit them anyways.
Minecraft Bedrock uses .tga image files for the above textures, but many photo/texture editors do not support them. Thankfully we don’t actually need to use them.
1. Grass Side:
Open “grass_block_side”.

Then open and place “grass_block_side_overlay” (shown above) on top.

Now you need to lower the opacity of the “grass_block_side” layer to 1% while leaving the “overlay” layer at 100%. The dirt should look basically invisible.

Finally you will export the texture as “grass_side.png” and move it to the “textures/blocks folder”.

2. Partially Emissive Entities:
Mobs like spiders, endermen, and drowns have parts of their textures that are emissive. Like the grass side, you will want to open the mobs texture such as “enderman”.

Again, you will open and place the emissive overlay on top such as “enderman_eyes”. It may place it in at 75% width/height; change that to 100% so it lines up.

Under the layers tab, select the layer that has the emissive sections.

Use the magic wand tool to select the blank space in that layer, them inverse the selection so that it is only the emissives selected.


Once the emissives are selected, switch back to the regular texture’s layer and “edit/clear” the selection. This leaves the emissive layer covering the part you just erased from the normal layer.

Now you will switch again to the emissive layer and change the opacity to 1%.

Finally you can export the texture as “enderman.png” and move it to the “textures/entity/enderman” folder.
3. Fully Emissive Mobs:
Glow squids are fully emissive which means that you just have to set the regular texture to 1% opacity and export.
NOTE: If you want the mob to be less brightly emissive, raise the opacity to somewhere above 1% but stay well below 100%.

(1%/most emissive: left, 50%: middle, 100%/non-emissive: right)
Thanks for using this tutorial! There will be more coming in the future.
NOTE: If you plan on publishing this pack or sharing it with anyone you should make sure to ask for permission and credit them as required. If it just a personal pack still make sure to credit them anyways.
Minecraft Bedrock uses .tga image files for the above textures, but many photo/texture editors do not support them. Thankfully we don’t actually need to use them.
1. Grass Side:
Open “grass_block_side”.
Then open and place “grass_block_side_overlay” (shown above) on top.
Now you need to lower the opacity of the “grass_block_side” layer to 1% while leaving the “overlay” layer at 100%. The dirt should look basically invisible.
Finally you will export the texture as “grass_side.png” and move it to the “textures/blocks folder”.
2. Partially Emissive Entities:
Mobs like spiders, endermen, and drowns have parts of their textures that are emissive. Like the grass side, you will want to open the mobs texture such as “enderman”.
Again, you will open and place the emissive overlay on top such as “enderman_eyes”. It may place it in at 75% width/height; change that to 100% so it lines up.
Under the layers tab, select the layer that has the emissive sections.
Use the magic wand tool to select the blank space in that layer, them inverse the selection so that it is only the emissives selected.
Once the emissives are selected, switch back to the regular texture’s layer and “edit/clear” the selection. This leaves the emissive layer covering the part you just erased from the normal layer.
Now you will switch again to the emissive layer and change the opacity to 1%.
Finally you can export the texture as “enderman.png” and move it to the “textures/entity/enderman” folder.
3. Fully Emissive Mobs:
Glow squids are fully emissive which means that you just have to set the regular texture to 1% opacity and export.
NOTE: If you want the mob to be less brightly emissive, raise the opacity to somewhere above 1% but stay well below 100%.
(1%/most emissive: left, 50%: middle, 100%/non-emissive: right)
Thanks for using this tutorial! There will be more coming in the future.
| Credit | Fishstacks |
| Tags |
6042388
6


 SidewaysEight
 latenightacademia
 CrystalRuby
 Papa Enny
 mrcool654321
 TorenokRed
 ScotsMiser
 Arianwyn

 MaximusPrime23
 Markus_INC
 TwoManBuilds
Create an account or sign in to comment.