


722
Hi there! If you're reading this, you're probably either a fan of my Arms & Armor resource pack, or perhaps you're just interested in learning how to add variants to your pack. Either way, this blog should serve as a tutorial on how to use Optifine to add custom armor and weapon variants to any Java resource pack! Alternatively, feel free to skip the blog and watch the video if that's your preference as they cover the same material.
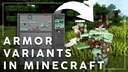
A little background... I've always wished there was more customizability in Minecraft, eventually everyone ends up in Diamond or Netherite armor that completely covers their character skin. So I set out to create a resource pack that included armor variants that you could use to customize your look and eventually added weapon variants as well.
It's actually a fairly easy process although it does require Optifine to work. Alright, let's get started!
STEP 1 - Make Some Art
First, you're going to want to create the artwork for your armor variants. I won't go into detail here as I'm assuming you already know how to create armor layer files, if not, you can always just recolor some of the vanilla armor to have something to work with, maybe create an "emerald" version of the diamond armor or perhaps create your own "light" version of the armor. Regardless, get your armor layer files ready.
Got them? Good!
STEP 2 - Write Some Code
Second, you're going to need to create some properties files. Don't worry, you don't need to actually know how to code, you can use my files as a template. There are five lines of code in each of the properties files and I'm going to roughly explain what each of them do AND what you need to change for your resource pack. I'm not a software engineer so keep your expectations low, below is the code for my crown model properties file.
# Made by Kalam0n
type=armor
matchItems=diamond_helmet
texture.diamond_layer_1=diamond_crown_layer_1
nbt.display.Name=ipattern:*crown*
Ok… line 1:
Now, go ahead and drop your armor layer files and associated PNGs into the armor folder.
STEP 3 - Give it Some (File) Structure
Next you'll probably want to create any related armor item files so that the item texture matches the model texture. Below is the code for my crown item properties file.
# Made by Kalam0n
type=item
matchItems=diamond_helmet
texture.diamond_helmet=diamond_crown
nbt.display.Name=ipattern:*crown*
If you take a look at my code for the Diamond Crown item, you'll notice the code is almost identical to the Diamond Crown armor, but take a close look at lines 2 and 4. In line 2 I've changed the type to item instead of armor. Then, in line 4, instead of referencing diamond_layer_1, I've changed it to texture.diamond_helmet=diamond_crown. In this case we are telling Minecraft to use the diamond crown texture in place of the diamond helmet texture. These properties files are named the same, but Minecraft will treat this one differently since it's going in the items folder.
Alright, so let's grab any new items properties files and the associated item textures and put them in our optifine>cit>item folder. This is the same process for any other item you want to create variants for, swords, shovels, and so on. It's easy to get lost here, so please feel free to take a close look at my resource pack's file structure and copy my code if you need to. I'm also happy to help troubleshoot if you get stuck, just leave a comment and I'll do my best to help out!
STEP 4 - Zip it Up
Last step! Assuming you've put your files together correctly, go ahead and zip up your pack and enable it in Minecraft. While the pack will still load in Vanilla minecraft, you'll need Optifine enabled to see the armor variants. So make sure you're playing with Optifine, and make sure you've enabled custom items in the Optifine video settings menu - then go rename your items using an anvil!
Now you know how to add armor and item variants to your Java Minecraft resource pack! If you haven't already checked out my Arms & Armor resource pack, I'd encourage you to download it here on Planet Minecraft - I just released a small update today to add a couple more textures and fix some couple bugs.
That's it for this tutorial. If you do add variants to your resource pack please feel free to share them with me, I'd love to see what you come up with! Check me out on YouTube for more Resource Pack goodness.
A little background... I've always wished there was more customizability in Minecraft, eventually everyone ends up in Diamond or Netherite armor that completely covers their character skin. So I set out to create a resource pack that included armor variants that you could use to customize your look and eventually added weapon variants as well.
It's actually a fairly easy process although it does require Optifine to work. Alright, let's get started!
STEP 1 - Make Some Art
First, you're going to want to create the artwork for your armor variants. I won't go into detail here as I'm assuming you already know how to create armor layer files, if not, you can always just recolor some of the vanilla armor to have something to work with, maybe create an "emerald" version of the diamond armor or perhaps create your own "light" version of the armor. Regardless, get your armor layer files ready.
Got them? Good!
STEP 2 - Write Some Code
Second, you're going to need to create some properties files. Don't worry, you don't need to actually know how to code, you can use my files as a template. There are five lines of code in each of the properties files and I'm going to roughly explain what each of them do AND what you need to change for your resource pack. I'm not a software engineer so keep your expectations low, below is the code for my crown model properties file.
# Made by Kalam0n
type=armor
matchItems=diamond_helmet
texture.diamond_layer_1=diamond_crown_layer_1
nbt.display.Name=ipattern:*crown*
Ok… line 1:
- # Made by Kalam0n
- Anything after a hashtag like this is just a comment. It lets other people viewing your code know what the code is for. I should actually go back in here and put something more useful, like "This file tells Minecraft when to swap the Diamond Helmet texture to the Crown Variant." I'd need to update dozens of files, and I'm lazy, but you're just starting out so you have a chance to do it right!
- type=armor
- This tells Minecraft what type of object this code is for, it will be the same for every variant armor model you create.
- matchItems=diamond_helmet
- This line tells Minecraft which piece of variant armor this code is for, in this case the Diamond Helmet, you'll need to adjust the "diamond_helmet" part based on which piece of armor you want to create a variant for.
- texture.diamond_layer_1=diamond_crown_layer_1
- This line specifies which png file to use in place of the standard png. In this case we want Minecraft to use the Crown variant, you should also be aware that Helmets, Chestplates, and Boots need to reference the layer_1 file while Leggings use layer_2. Make sure to update the layer when you're creating variant leggings.
- nbt.display.Name=ipattern:*crown*
- Ok, now this is key, it tells Minecraft when to render the variant PNG in place of the standard one. In this case we want the crown variant any time a diamond helmet uses a name that includes the word "crown". The asterisks tell the game to look for that text string anywhere in the name, so the user can get a little creative with how they name the item in game, so long as "crown" is somewhere in the name, the game will use the crown texture.
Now, go ahead and drop your armor layer files and associated PNGs into the armor folder.
STEP 3 - Give it Some (File) Structure
Next you'll probably want to create any related armor item files so that the item texture matches the model texture. Below is the code for my crown item properties file.
# Made by Kalam0n
type=item
matchItems=diamond_helmet
texture.diamond_helmet=diamond_crown
nbt.display.Name=ipattern:*crown*
If you take a look at my code for the Diamond Crown item, you'll notice the code is almost identical to the Diamond Crown armor, but take a close look at lines 2 and 4. In line 2 I've changed the type to item instead of armor. Then, in line 4, instead of referencing diamond_layer_1, I've changed it to texture.diamond_helmet=diamond_crown. In this case we are telling Minecraft to use the diamond crown texture in place of the diamond helmet texture. These properties files are named the same, but Minecraft will treat this one differently since it's going in the items folder.
Alright, so let's grab any new items properties files and the associated item textures and put them in our optifine>cit>item folder. This is the same process for any other item you want to create variants for, swords, shovels, and so on. It's easy to get lost here, so please feel free to take a close look at my resource pack's file structure and copy my code if you need to. I'm also happy to help troubleshoot if you get stuck, just leave a comment and I'll do my best to help out!
STEP 4 - Zip it Up
Last step! Assuming you've put your files together correctly, go ahead and zip up your pack and enable it in Minecraft. While the pack will still load in Vanilla minecraft, you'll need Optifine enabled to see the armor variants. So make sure you're playing with Optifine, and make sure you've enabled custom items in the Optifine video settings menu - then go rename your items using an anvil!
Now you know how to add armor and item variants to your Java Minecraft resource pack! If you haven't already checked out my Arms & Armor resource pack, I'd encourage you to download it here on Planet Minecraft - I just released a small update today to add a couple more textures and fix some couple bugs.
That's it for this tutorial. If you do add variants to your resource pack please feel free to share them with me, I'd love to see what you come up with! Check me out on YouTube for more Resource Pack goodness.
| Tags |
tools/tracking
5222757
6
adding-armor-amp-item-variants-to-java-minecraft-resource-packs

 CrystalRuby
 LanceP501
 man of armageddon
 mega7
mega7 Riseabove089
 BlissyMissy
 KaiOceansword
 ScotsMiser


 illystray

 pathisgamer
Create an account or sign in to comment.