


 MisterGriimm
How to make a good looking render in under 10 Minutes
Small Disclaimer, you may want to take more than 10 minutes to polish it up - in that case, this will be a good starting point.
"Materials" Needed
- Blockbench
- Sketchfab Account
Starting out
First things first, you'll wanna make sure you register for Sketchfab and configure the upload/export features in Blockbench.
In Blockbench go to File > Export > Upload to Sketchfab and follow the prompts (description, meta-data, tags, etc.)
You will need to get your Sketchfab API Token in order to upload. This can be found in your Sketchfab Settings.
You can also enter this API in your Sketchfab Settings.
![[TUT] How to render a Blockbench model in under 10 minutes](https://i.gyazo.com/ea302ad9837a14b112bc57828aca3ad9.png)
Prep Work
Prep will vary depending on how many parts you have in your model and which effects you wish to utilize.For this tutorial, we'll be utilizing the base texture feature, as well as the emission feature.
In your Blockbench model, you'll need to separate the elements you want to have as emission textures.
The method for this is as follows:
1. Create a duplicate of your base texture
2. Rename it to something like model_name_here_emission.png
3. Go into the texture and erase/delete anything that isn't going to be emitted
![[TUT] How to render a Blockbench model in under 10 minutes](https://i.gyazo.com/b973a14107bccc694050b3912a9247bb.png)
![[TUT] How to render a Blockbench model in under 10 minutes](https://i.gyazo.com/a725ab945b05b3442d404f8865cf04aa.png)
4. Import the texture
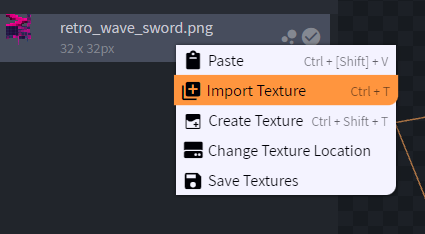
5. Select the elements that correlate to the texture - right-click the texture file and select apply to elements
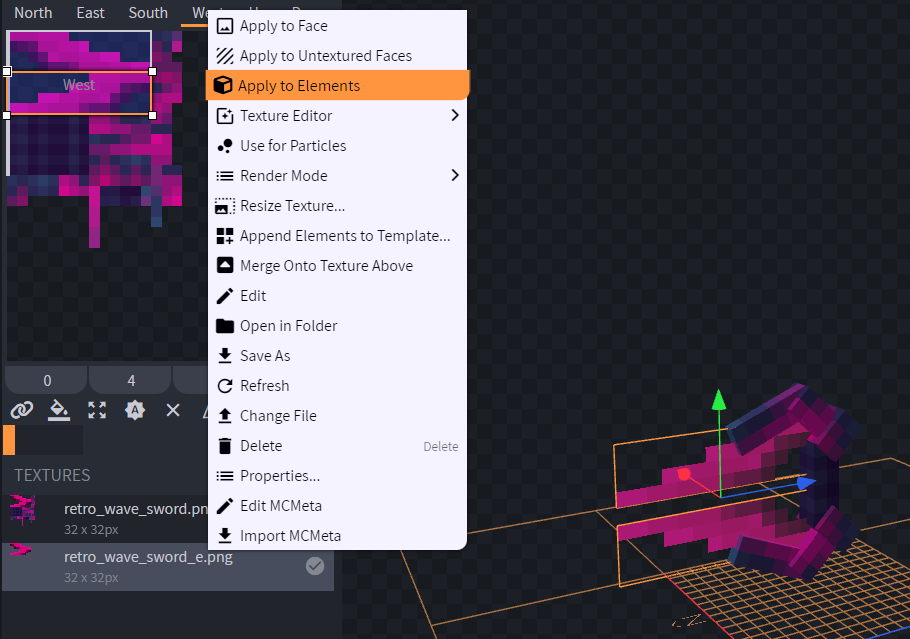
6. Now go to File > Export > Upload to Sketchfab
After filling out this information and clicking confirm it will generate a link to your upload on Sketchfab.
Rendering
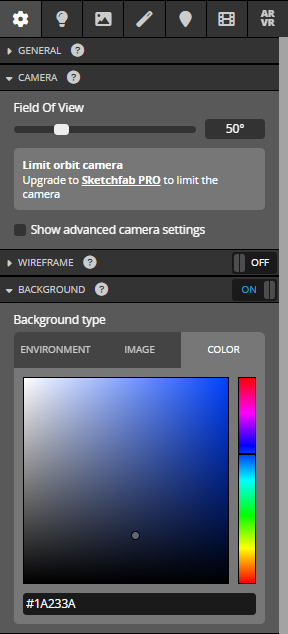
Once on the Sketfab website previewing your model go ahead and click "Edit 3D Settings" - Due to the model processing you may have to wait for a minute or two
Once in the 3D Editor view, there are a couple of key things that we'll be focusing on.
This will be the Materials tab and the Post-processing effects tab. Feel free to play around with lighting to get what best fits your model.
For the purpose of this tutorial, I have used these settings as the baseline due to the model color and variant.
The real meat and potatoes of the render is in the materials tab.
Because we assigned different materials to different elements you have to select the object you want to edit.

For the handle of this object, we'll want it to be slightly shiny and a little darker than the blade.
We'll swap it to a specular workflow and use a glossiness factor rather than the roughness factor.
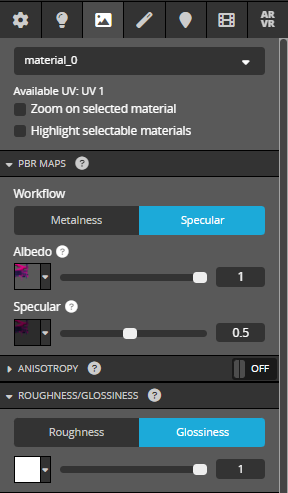
For the blade, we'll play with a lot more than just PBR and Glossiness.
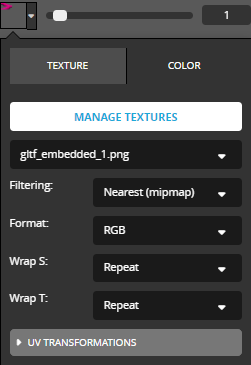
You'll need to select this black dropdown and change the texture to the one that your emission correlates to.
Once selected you'll need to update the settings to keep it matching to the pixelated style.

While you'll ultimately need to tweak these to your needs this provides the baseline for getting a clean-looking render.
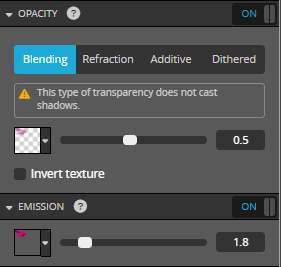
Because the blade consists of 2 single planes with no intersections we can edit the transparency too! You can see the transparency where the blade meets the handle. KEEP IN MIND That some transparency methods DO NOT WORK WITH EMISSION - This is going to be a trial and error thing when working on your render.

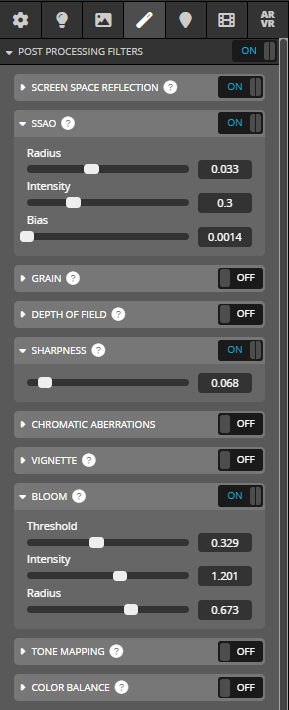
Now onto the Post-Processing Effects!
SSAO creates ambient occlusion on your model giving it a bit more depth. Don't go overboard with this!
Sharpness does exactly what it sounds like. Can give a funky cell-shading effect if overused.
Bloom is what creates the glowing effect on the item!
When using bloom it's a good idea to jump back and forth between bloom and emission when dialing it in. Just play around with it!
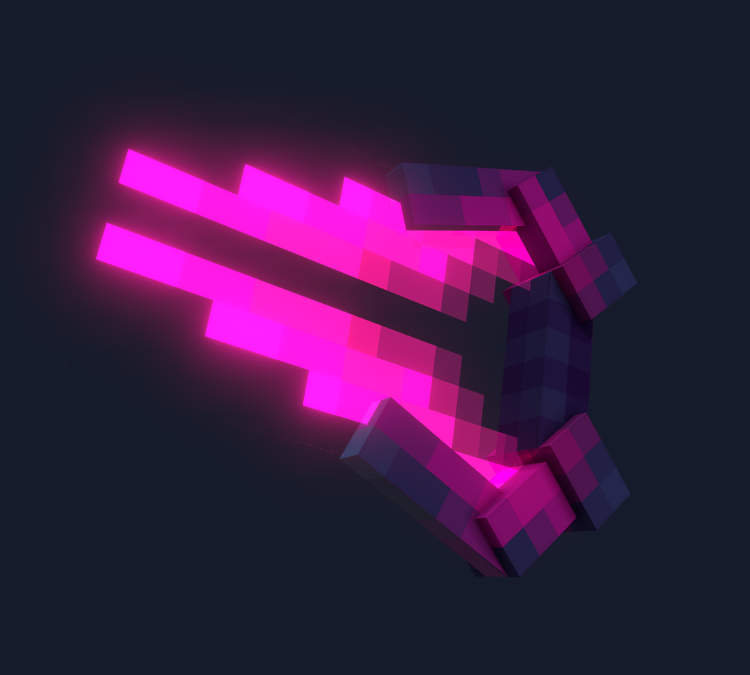
The end result is shown below (different render than the featured image)
The featured image took around 15-20 minutes to dial in, whereas this one was done in 10 minutes!
Additional features
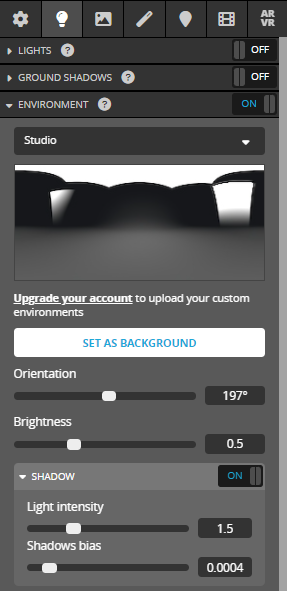
When you've finished up your material properties and post-processing effects it's a good idea to go back to your lighting and background options and fine-tune them to your end result. It can really help tie everything together.
Lastly, you can try your hand at adding additional lighting!
Here's a comparative look at what lighting can do.


Drop a comment if you have any questions!!
| Tags |
5533172
6


![[TUT] How to render a Blockbench model in under 10 minutes Minecraft Blog](https://static.planetminecraft.com/files/image/minecraft/blog/2022/172/15546906-retro-wave-sword-sketchfab-text_s.jpg)
![[GE] - Minecraft 3D Modeling Resources Minecraft Blog](https://static.planetminecraft.com/files/image/minecraft/blog/2022/290/15410579-dresourcesthumbnail_s.jpg)


 TheMountaineer
 hotsuop
 TheRedDemon
 SoulBadger
 prairie rose
 parallax25
 ItzOrangey
 Panda_Tyger
 KeyDevy


Create an account or sign in to comment.
Would it be possible to only make a certain part of a cube illuminate? Sort of like only having 1 pixel of a 2x2 cube glow and not the rest
I'll usually turn the emission up on the part I need so it blooms sooner than the rest of the model.
1. Create a duplicate of your base texture
2. Rename it to something like model_name_here_emission.png
3. Go into the texture and erase/delete anything that isn't going to be emitted
Where I kept only the sword blade, that's what you'd do for the eyes.