


 Angelonasher
0. Hello, and welcome to my first tutorial.
If you read the title, (hopefully you did and are not just blindly pressing on blogs), you know that I will teach you how "to shade hair". This is just the way I personally shade hair. It does not mean it is the right way, or even a good way.
I'll be instructing you on how to shade black, white, and pink hair. I'm not going to a full-on 10-hour tutorial because you should take what's from here and experiment on your own. I'm only giving you the head, not braids, longer hair, or bangs.
1. Black (or other very dark colors)
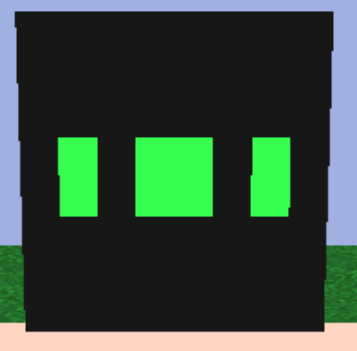
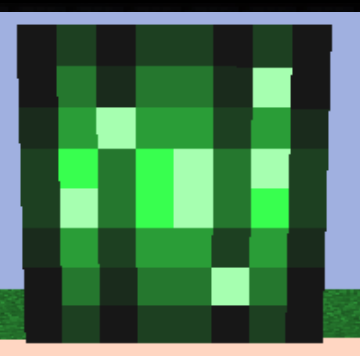
First off, color the head completely black (except the face, y'know)
Afterwards, select a neon/ bright color. I prefer cyans or green for shading black.
Place the color in three sections like this:
Change the colors opacity to around 60% and place that color like this:
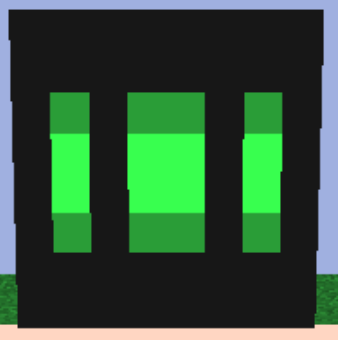
Then change the color to around 40%
(Wow it's starting to look good now)
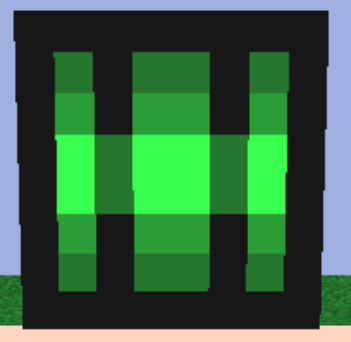
Now do around 20% I made a mistake in the image below, but you are also supposed to put the color above and below the middle column.

Now select the previous color (the 20%) and change the opacity to around 40%

We have finished what I call, the "Base". Now it's time for the highlights that make it extra shiny C:
Select the original color (the one in the middle) and make it brighter (like, way brighter)
And do something like this:
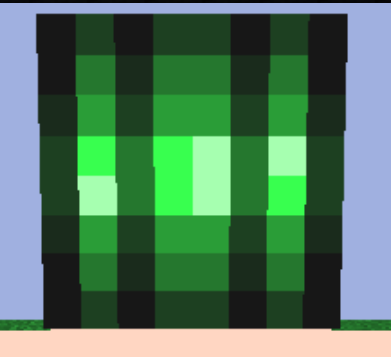
Then, I like to add a few (usually three) pixels in randomish places to back it looks evens shinier:
Lastly, use the Armor layer to add some depth to the hair (I just do it wherever it feels right, but try not to go overboard)

And there you go. You followed a tutorial that was made to be as easy as possible. Don't you feel so proud of yourself?
2. Pink (or any other medium-ish color)
For a more medium tone color, I usually just take a lighter version of that color and do the same process as above (example below)

But for this tutorial, I decided to get another color, since it makes the hair more interesting. You can still use the other method if you prefer it. I use both, and I guess it depends on the vibe? (I have never used the second one tbh, but I'm making a skin with it XD)
First of all, find a color that kind of makes sense with the hair color. (don't go shading orange with swamp green. Actually, don't shade any hair color with swamp green) You can pick colors that are close (such as yellow for orange or pink for purple) or colors that are more apart.
We will be using a blue-purple kind of color.

Now the first thing you probably noticed is that this color is darker than the hair color. Yep. You don't have to do that though, this is just ~personal preferance~ The rest of the process is the same as the black for the most part so I'm not going to talk you through this. You're a big skinner now, you can do this.


Okay, so, now, instead of using a lighter version of the shading color, I actually went for a lighter, more blue-er blue.

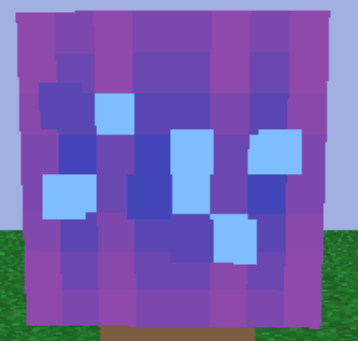
And there you go, you're done!

Which shading did you prefer? Tell me in the comments C:
3. White
Now, the dreaded enemy, white. Obviously, the shading is going to be darker than the hair color. You can use a neon-ish or not neon-ish color (same with the medium above) but it'll prob look better with neon to try to make the color as bright as possible.
I went with a cyan/toothpaste color.

For white, you don't change the opacity, but instead, make the color darker. I can't tell you how dark to make it every single time, but just do what looks right.

For the next step, also put the color on the outside of the outer columns.

So I know that we aren't going as far with the shading as the other ones, but we want this to still look white.
Add the highlights (which will be white)

Then add some light gray (I used 90% lightness) like this. I feel that it adds a bit more depth to the hair.

And then add the armor layer.

There is probably a better way to shade white, but I don't know how. If you know of one, tell me C:<
Anyways, thaTs it. Why are you still here?
------------------------------------------------------------------------
SouthDakotaGirl telling me I have permission to make this tutorial here
| Tags |
1 Update Logs
Update #1 : by Angelonasher 04/12/2022 11:29:37 pmApr 12th, 2022
I kind of changed the ''3. White'' section of the tutorial because I just realized how to make it look better C:
5547375
6


 hotsuop
 BroccoliTheGirl
 User5145163G
 Yuzukodo
 MaximusPrime23
 ItBeTales

 McMeddon
 sgtbruce
 mister kostya
Create an account or sign in to comment.